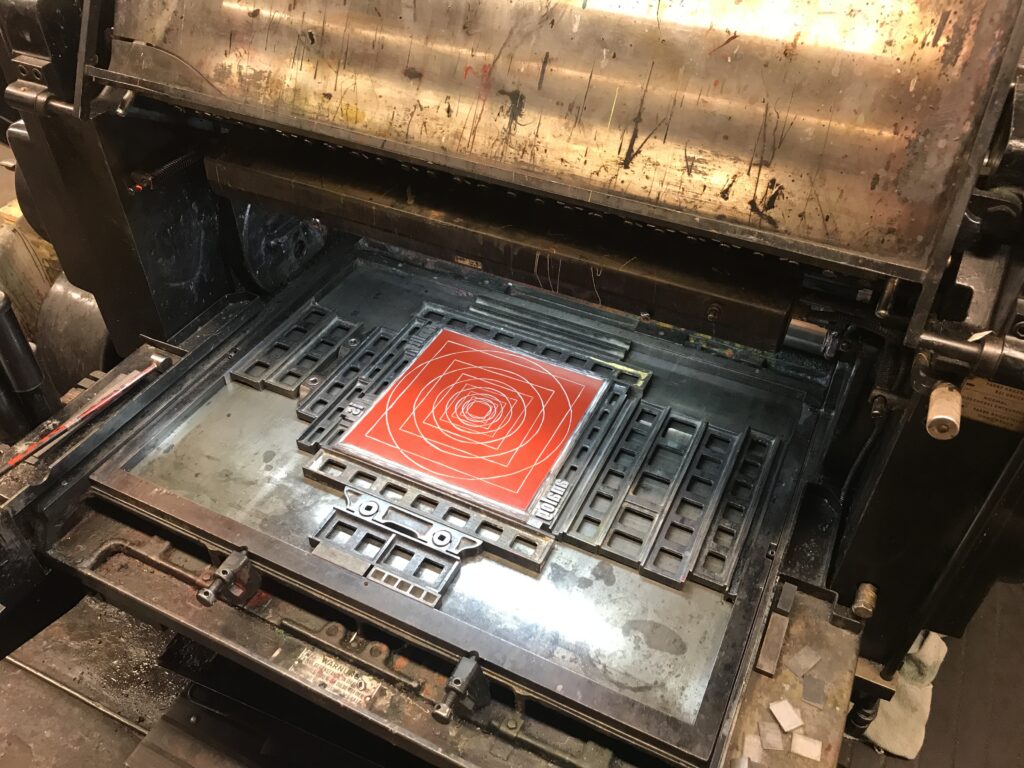
After I had set the letters and printed a variety of prints together with the lino cut on the Asbern proof press, everything was ready for the print edition of about 100 460x660mm posters on the Heidelberg Zylinder at Druckzeug.
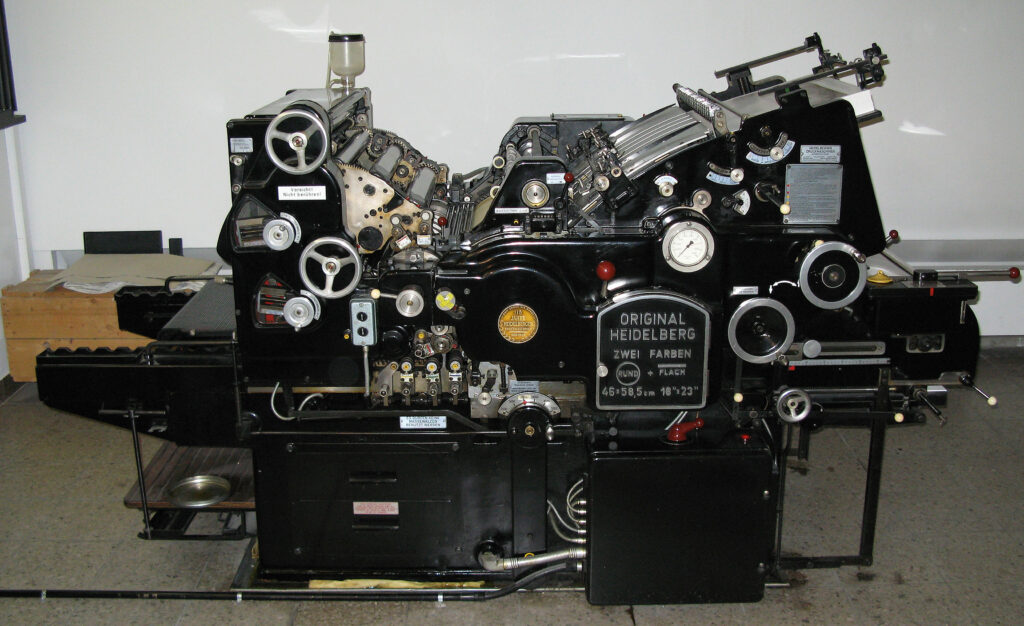
The Original Heidelberger Zylinder (OHZ) was produced between 1935 and 1979 and could print sheets of paper, depending on the machine mode, up to 104 x 72! Heidelberg Cylinders are fully mechanical (automatic) printing machines that improved the technical principles of earlier mechanical cylinder presses (which again were the results of technical improvement of manual cylinder presses).
In general the press is driven by a set of gears, which run the “paper run” (Papierlauf), a system of various picker arms transporting the paper, an inking unit, the moving fundament with the attached print forms and of course the central cylinder. Though later models were able to print two colours in one run, with the most common OHZ-S printers it’s only possible to print one colour on one side of the paper per printing run, though still it is possible to combine letterset with other printing forms in the same run.
How each unit of the machine work together in a synchronous way is as fascinating as it is ingenious: on the one side of the machine an aspirator is taking one sheet of the paper stack, which slightly moves up step by step. From the aspirator the first picker arm transports the sheet to the next picker on the cylinder. At the same time, on the other side of the machine there’s an inking unit that distributes a certain amount of colour over a set of metal and rubber rolls. On this side the printing block is set on a fundament that is running like a sleigh in and out the machine. By passing the inking unit the block takes the right amount of colour for the print, which happens while the sleigh is running beneath the rotating cylinder. After one rotation the cylinder forwards the printed sheet of paper to another set of pickers that eventually release the print below the unprinted paper stack.
The adjustments that are necessary to properly operate the OHZ are in general the run of the paper (adjusting the replenishment of paper), setting the right position of the printing image by adjusting printing block and paper (again the “Anlage” needs to be fine tuned to guarantee the same position on each print), preparing the printing block on the fundament, strengthening the “Aufzug” (a sheet of paper that’s tightened to the metal cylinder) on the cylinder to adjust pressure, as well as the adjustment of the inking unit.
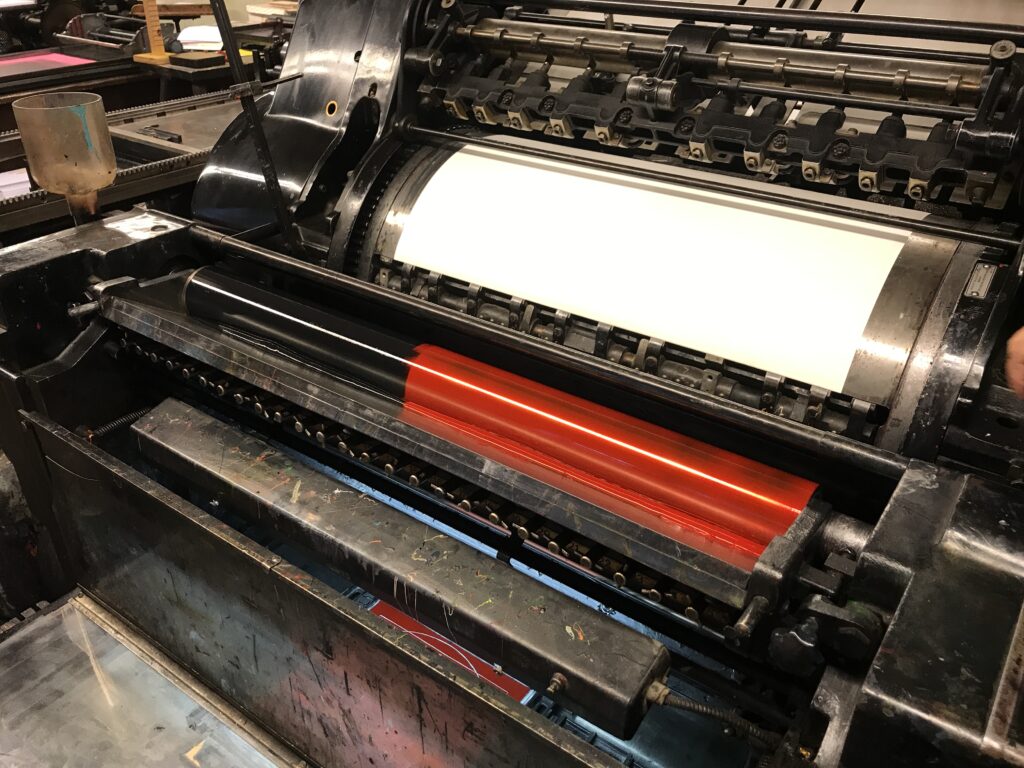
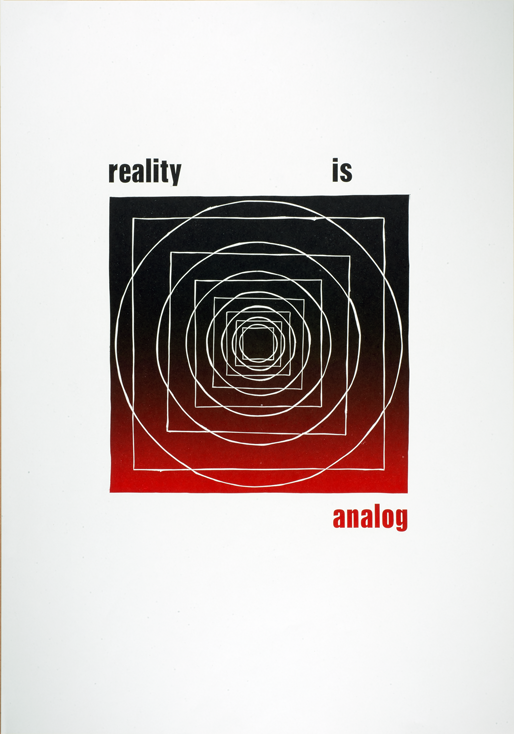
As I already had the proof prints, I didn’t have to adjust the height of letters and lino cut and being instructed by a skilled and experienced printer who learned the processes of letterpress before it became an extinct job, we decided to make use of the adjustable zones of the inking unit to print a black and red gradient. Again within the inking unit you’re able to adjust the amount of colour you need for specific areas of your print. Too little colour for bigger areas will result in little saturation, while too much colour, e.g. for small types, will result in blurry edges. As the ink is manually put in to the inking unit you can decide on the position of your gradient.
For my printing experiment we also adjusted the position of the gradient, turning more into black towards the last few copies. Therefore the next part of my print experiment aims at investigating the appearance of the gradient, but also at looking for various inaccuracies that may come with using analog materials and printing techniques – stay tuned for part six, repro photography of print edition.
Sources:
https://digital.deutsches-museum.de/item/78462/
https://de.wikipedia.org/wiki/Zylinderpresse