The Use of Sound for Healing Purposes

Music/sound has always been a big part of the human experience. It has been used in a wide variety of purposes- from religion to entertainment. However, there is one more aspect that has become more prevalent in the modern times- sound healing. This article will discuss the following aspects of this field:

  • The impact of low frequency sound (including infrasound) on our bodies
  • The psychological aspect behind sound healing
  • Exotic instruments that are widely used in sound therapy and are commonly referred to as “healing instruments”

Low Frequency Sounds

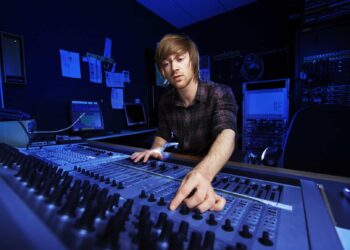
One of the machines used for Vibroacoustic therapy. All parts are explained

When talking about low frequency sounds, the focus is on sounds at 250 Hz and below. Special attention should also be paid to infrasounds (1-16 Hz). A study titled “Possible Mechanisms for the Effects of Sound Vibration on Human Health” (Bartel, Mosabbir) mentions which mechanisms sound vibration impacts. These include: stimulation of endothelial cells and vibropercussion; of neurological effects including protein kinases activation, nerve stimulation (specifically vibratory analgesia) and oscillatory coherence; of musculoskeletal effects including muscle stretch reflex, bone cell progenitor fate, vibration effects on bone ossification and resorption, and anabolic effects on spine and intervertebral discs.  The conclusion points to the complexity of the field of vibrational medicine and calls for specific comparative research on type of vibration delivery, amount of body or surface being stimulated, effect of specific frequencies and intensities to specific mechanisms, and to greater interdisciplinary cooperation and focus. Based on my own anecdotal experience, I would say that all the above-mentioned mechanisms do get targeted with prolonged and regular exposure to sound vibrations. It is most effective when these sounds are used in a calming meditative atmosphere after a short warm-up meditation.

The Psychology Behind Sound Healing

Sound healing session with different instruments

In the context of psychology, it is important to mention that sound healing doesn’t only focus on hearing, but it is also a tactile and visual experience. Music is also impacted by the type and shape of space it is played in. This is why architecture is also important in the perception of sound. Sound healing has ancient roots in cultures all over the world, including Australian aboriginal tribes who used the didgeridoo as a sound healing instrument for over 40,000 years to ancient such as Tibetan or Himalayan singing bowl spiritual ceremonies. Sound meditation is a form of focused awareness type of meditation. One kind that has become more popular is called “sound baths,” which uses Tibetan singing bowls, quartz bowls, and bells to guide the listener. These practices highlight themes of how the experience of sound manifests not only through hearing but through tactile physical vibrations and frequencies. A review of 400 published scientific articles on music as medicine found strong evidence that music has mental and physical health benefits in improving mood and reducing stress. In fact, rhythm in particular (over melody) can provide physical pain relief.

Sound Healing Instruments

Singing Bowls/Crystal Bowls

Singing Bowls are made from metal and crystal ones are made from pure Quartz. Crystal bowls might be more interesting to talk about because our body has a natural affinity to quartz. On a molecular level, our cells contains silica, which balances our electromagnetic energies. Crystal acts as an oscillator, magnifying and transmitting pure tone. As the sound affects brainwave activity one can enter into an altered state of consciousness. As different parts of the brain are affected, it is probable that they release different hormones and neuro-chemicals. Both regular and singing bowls produce sustained pure vibrating tones that induce a state of trance and physical relaxation. Singing bowls began their journey in the ancient time of Buddhism. It is believed that singing bowls were an integral part of practicing Buddhism. Notwithstanding these origins, sound therapy has traveled across many religions and cultures throughout their history

Didgeridoo

The Didgeridoo is a wooden BRASS instrument thought to have originated in Arnhem Land, Northern Territory, Australia. Researchers have suggested it may be the world’s oldest musical instrument, The oldest cave painting were dated 3000 to 5000 years old. It can be over 40,000 years old. There is a little evidence of the didgeridoo being used as far south as the Alice Springs region of Australia, but traditionally never in the southern three quarters of the country. It has been suggested that the Didgeridoo was an adaptation of traded instruments from India and/or Asia, this is possibly why it was mainly used by coastal tribes of the far North of Australia.  Traditionally didgeridoos were made from eucalyptus tree trunks and limbs hollowed out, while still living, by termites, (a small insect like an ant but a relative of the cockroach) or from bamboo in the far north of Australia. Traditionally the termite hollowed Didgeridoo was cut to an average length of 130 to 160cm and cleaned out with a stick or sapling. Today didgeridoos are made from a large variety of materials such as Glass, Leather, Hemp Fibre, Ceramic, Plastic, Fibreglass, Carbon Fibre, solid timbers carved out, logs drilled out, dried/hollowed Agave cactus stems, Aluminium and other metals and just about any material which can be formed into a hollow tube! The didgeridoo was traditionally used as an accompaniment along with chants, singers with Bilma (Tapping sticks) and dancers, often in ceremonies. Today the didgeridoo is heard in almost every style of music, rock, jazz, blues, pop, hip hop, electronic, techno, funk, punk, rap etc. There are truly no limits to the use of this awesome instrument. In a few aboriginal groups in certain ceremonies men only played the didgeridoo, but in many groups, outside of ceremony, men, women and children played it. In the same way the guitar originating in Europe, is now owned, made and played by people across the world, the Australian didgeridoo is now owned, made and played by many people all around the globe.

Handpan/ Hang Drum
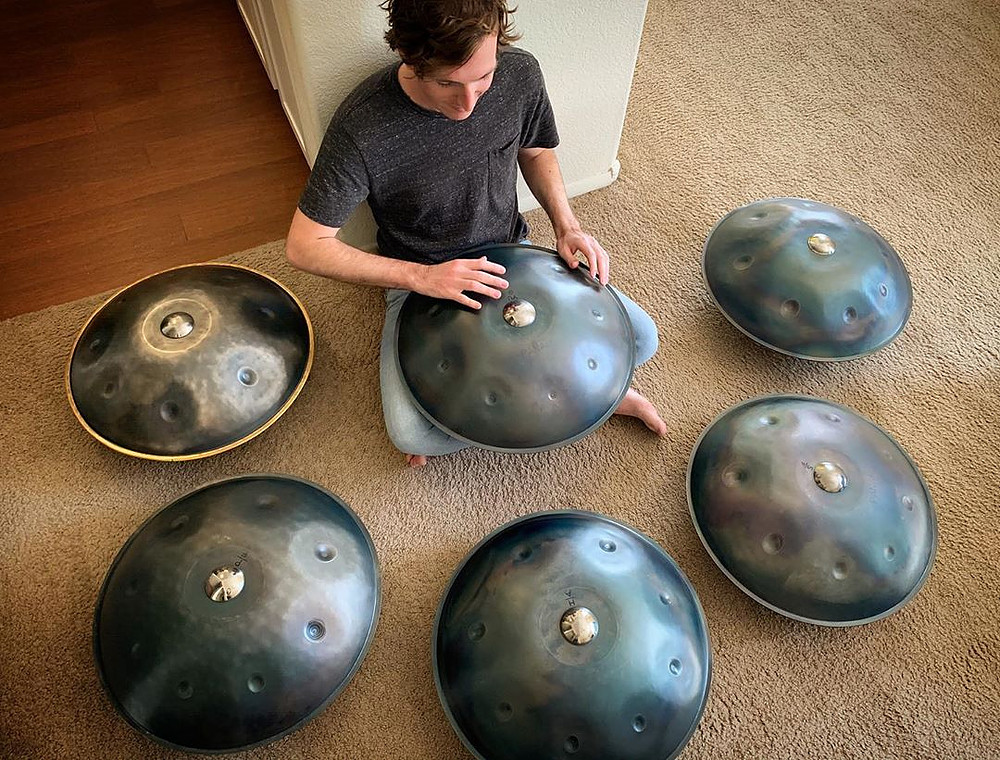
There are many different types of handpands, with prices ranging from a few hundred to an astounding few thousand dollars (the latter would be for the original PanArt Hang Drum). These instruments are similarly made of curved metal, like the steel drum from Jamaica. This is a relatively new instrument originating from 2001. At first, the Hang was sold by only a few select distributors around the world.  Acquiring an early version of the instrument required someone to get into contact with these distributors, and it was not uncommon for them to sell out quickly.  Years passed, and eventually PANArt only sold the Hang from their workshop.  An in-person visit to the PANArt workshop was required to retrieve the Hang, and it was invitation only. Eventually, the allure of the Hang took hold, and demand for the instrument skyrocketed.  Other steel pan builders saw this new demand and focused their efforts on creating something similar. As the term ‘Hang’ is a registered trademark of PANArt, these other companies had to come up with a universal term for this hand-played steel instrument.  There has been much debate in what term should be used, but now the most commonly used word is “handpan”, a term introduced by the company “Pantheon Steel” who makes the Halo handpan. PANArt has said, on many occasions, that the hang is not a handpan.  Their reasoning is that the hang is crafted using techniques not seen in the steelpan and handpan world.  Specifically, it has to do with the structure of the notes themselves, and how the tone fields are formed and tuned.  The Iskra sound sculpture, made by Symphonic Steel, is based upon these unique forming and tuning methods devised by PANArt.

Frame Drum/Shaman Drum

The shaman drum is another very old instrument used for ritual and healing purposes. Some of the oldest known ritual burials were of female shamans or priestesses, in areas as far apart as Germany and Israel, dated from 8,000-12,000 years ago. … Ritual drums were often painted red to depict menstrual blood, had symbols of the vulva, and rituals centered around fertility. Continuous fast drumming, using a hand held frame drum, at the rate of 180-250 bpms is traditionally the most common method of eliciting a trance state which allows the participant to experience “non-ordinary reality”. This predates every other form of religious ritual and has a common methodology across cultures and continents, based on the findings of archaeologists and anthropologists around the world. Similarities in ritual forms, ritual implements like drums and rattles, costumes of the shaman and descriptions of the non-ordinary reality during trance states are remarkably consistent in indigenous peoples from Asia, Europe, the Middle East, Australia, and the Americas. Many of these traditions still survive and are currently practiced.

Resources

https://www.ncbi.nlm.nih.gov/pmc/articles/PMC8157227/

https://www.psychologytoday.com/us/blog/urban-survival/201907/the-healing-power-sound-meditation

https://www.shantibowl.com/blogs/blog/the-definitive-guide-to-crystal-singing-bowls

https://www.symphonicsteel.com/handpan-history/

Processing of action and non-action sounds

The human brain always amazes with every single research that is done about it.

Our perception of the whole word depends on how the information we receive is processed in it.

A study I recently read deals with an interesting aspect of how the sound of actions is processed in our brains.

Research on this topic began with the suggestion derived from neuropsychological researches that the brain does not process all sound events in the same way, but that it makes a distinction between the sound produced by one agent (actions) and all others.

The research started from the analysis of audiovisual mirrors in the brains of monkeys, and some more recent experiments on humans suggest the existence of two different brain mechanisms for sound processing.

Action-related sounds activate the mirror system (with, in addition, a motor action program, to represent how the sound was produced.) Non-action-related sounds do not.

In one experiment, Lahav [2] played some non-musicians to listen to a piece of piano music they had just learned and showed that their premotor areas of the brain were activated, whereas it wasn’t when they were listening to a piece they hadn’t learned.

This not only triggers a representation of how the sound was produced, but could also prepare a listener’s reaction.

 “Cognitive representations of sounds could be associated with action planning patterns, and sounds can also unconsciously trigger further reaction from the listener.” [1]

This mirror system is also activated when the action can be seen, so it could be interpreted as an abstract representation of the action in our brain.

Resources

[1] T. Hermann, A. Hunt, J.G. Neuhoff –  The Sonification Handbook

[2] A. Lahav, E. Saltzman, and G. Schlaug. – Action representation of sound: audiomotor recognition network while listening to newly acquired actions.

Das Sounddesign von Diablo IV

Hallo, Reisende. Ich bin Kris Giampa, Sound Supervisor für Diablo IV.

Das Soundteam arbeitet nun schon eine ganze Weile an der Klanglandschaft von Diablo IV. Zwar sind wir noch nicht bereit, die Musik des Spiels in aller Tiefe vorzustellen, jedoch wollten wir euch ein paar Einblicke in die Audioprozesse, Inhalte und Motivationen verleihen, die unsere Soundentwicklung bestimmen.

Bevor wir anfangen, wollten wir euch etwas zum Anhören geben, während ihr dieses Quartalsupdate lest. Genießt die verschneite, düstere und stürmische Atmosphäre der Zersplitterten Gipfel, während ihr euch auf die Reise begebt. https://www.youtube.com/embed/F0G4ECzssK8?theme=light&color=white&cc_load_policy=1&HD=1&rel=0&showinfo=0

Sound und Musik sind für Spiele der unsichtbare Klebstoff, der die Narrative zusammenhält und euch an euren Charakter und dessen Aktionen im Spiel bindet. Die Entwicklung des Sounds für ein Spiel ist eine spannende künstlerische Herausforderung, die man nicht sehen, sondern nur hören kann. Jedoch könnt ihr auch im wahrsten Sinne spüren, wie der Schall euren Körper erfüllt – je nachdem, womit ihr den Sound abspielt. Es ist ein unglaubliches Medium, das beeinflussen kann, was ihr beim Spielen empfindet. Oft ist das sehr subtil, gelegentlich ist es übersteigert, aber der Sound ist immer da, um das Gameplay in jedem Augenblick zu unterstützen. Wir hoffen, dass euch dieser Einblick in die verschiedenen Aspekte der Klangwelt des Spiels gefällt. Euch erwartet noch viel mehr davon, wenn ihr endlich die Gelegenheit bekommt, selbst zu spielen!

Natürlich wollen wir auch, dass diejenigen von euch mit Hörbeeinträchtigungen Diablo IV ebenfalls genießen können. Deswegen arbeiten wir daran, die Spielerfahrung für Menschen mit Hör- oder Sehbeeinträchtigungen inklusiv zu gestalten. Es gibt verschiedene Features für Barrierefreiheit, denen wir uns in Zukunft an dieser Stelle ausführlicher widmen wollen.

Der Teufel steckt im Detail

Für die Klanglandschaften von Diablo IV haben wir die Tradition der befriedigenden Kampfsequenzen fortgeführt, die Atmosphäre weiter ausgebaut, um die offene Welt zu unterstützen, und uns in die düstere und blutige Stimmung vertieft. Zugleich haben wir uns bemüht, einen klareren und dennoch ausdrucksstarken Sound zu liefern, der sich dem Spielgeschehen dynamisch anpasst.

Eines unserer wichtigsten Ziele als Sounddesigner ist es, die qualitativ hochwertigsten Töne in Echtzeit im Spiel auszulösen und sie gemäß euren Erwartungen in der Welt verwurzelt und somit glaubwürdig erscheinen zu lassen. Wenn es ums Gameplay geht, hat die Zufälligkeit der Audiowiedergabe den allerhöchsten Stellenwert. Im echten Leben nimmt man keinen Ton zweimal auf exakt dieselbe Art und Weise wahr, weil sich die Hörumgebung oder die Positionierung der Quelle unterscheidet. Töne werden nie mit dem exakt gleichen Schalldruck erzeugt und durch Reflexionen in der Umgebung sowie alles andere, was in diesem Moment um euch herum geschieht, verzerrt. Kurz gesagt gibt es immer subtile, in der echten Welt verwurzelte Gründe, warum sich nichts jemals exakt gleich anhört. Das bedeutet, dass wir als Sounddesigner in einem Videospiel stets versuchen, subtile, zufällige Variationen hinzuzufügen – nicht nur dem Sounddesign an sich, sondern auch der Wiedergabe im Spiel. Wenn wir unsere Arbeit gut machen, ist das etwas, das ihr nicht bewusst bemerkt und das eure Immersion im Spiel unterstützt, indem die Grafiken, die Geschichte und die gesamte Erfahrung glaubhaft untermalt werden.

Ein weiteres wichtiges Ziel bei der Entwicklung des Sounds für Diablo IV ist die Erschaffung von Tönen für so ziemlich alles, was auf euren Bildschirmen passiert. Die Atmosphäre der Welt, Monster außerhalb des Bildschirms, die kleinen Holzsplitter, die von einer Wand abprallen, wenn ihr etwas kaputtmacht … alles sollte ein Geräusch machen. Wir investieren zahllose Stunden an Arbeit, um fast alles zu vertonen, was ihr seht oder auch nicht seht – und das gleichzeitig subtil genug, dass es nicht ablenkt, sondern sich genau richtig anfühlt. Hier steckt der Teufel definitiv im Detail …

Aber nur, weil wir so ziemlich alles vertonen, bedeutet das nicht, dass ihr diese Töne auch jedes Mal hören müsst. Basierend auf strikten Einstellungen, die wir als Grundregeln festlegen, löst die Playback Engine im Spiel nur eine begrenzte Zahl an Instanzen eines Tons aus, wenn diese alle gleichzeitig abgespielt werden müssten. Aufgrund der isometrischen Kameraperspektive und der Tatsache, dass so vieles gleichzeitig auf dem Bildschirm erscheint, müssen wir einschränken, wie viele Instanzen eines Tons zu einem bestimmten Zeitpunkt abgespielt werden. Mit der richtigen Abstimmung fällt gar nicht auf, dass einige Instanzen gar nicht ausgelöst werden. Das trägt zu einem klareren Sound bei. Es ist ein schmaler Grat, den wir in den epischen Momenten, in denen jede Menge auf dem Bildschirm passiert, genau treffen müssen.

Kommen wir jetzt zu den kreativen Aspekten des Sounddesigns. Natürlich gibt es kein Diablo-Spiel ohne die Helden, die unter eurem Befehl die verschiedenen Übel bezwingen, die sich euch in den Weg stellen. Sprechen wir über einige Feuerfertigkeiten des Zauberers, die zum Kern dieser Klasse gehören …

Helden-Feuerfertigkeiten

Das Soundteam hat das große Glück, alle möglichen spannenden und einzigartigen Töne für das Spiel aufnehmen zu können. So haben wir eine große Vielfalt an Ausgangsmaterial, das wir bearbeiten können, wenn es ans Sounddesign geht. Technisch beschrieben ist Sounddesign der Prozess, Tonaufnahmen zu bearbeiten und zur Verwendung in einem anderen Medium weiterzuverarbeiten. Beim Sounddesign für Videospiele fertigen wir Rohaufnahmen an, bereiten sie auf und bearbeiten sie auf unterschiedliche Arten, um sie unseren Gameplay-Bedürfnissen anzupassen und ein klares, wiederholbares Audio für das Spiel zu schaffen. Manche Töne werden genau so verwendet, wie wir ursprünglich beabsichtigt hatten, während andere am Ende völlig anders klingen an einer völlig anderen Stelle zum Einsatz kommen.

Eine Sache, die wir für ein Spiel wie Diablo wirklich immer brauchen, ist natürlich Feuer! Wenn die Zeit es zulässt, planen wir immer einige Aufnahmesessions im freien Feld. Eine der ersten großen Aufnahmen, die wir als Team für Diablo IV angefertigt haben, war eine Feuersession in der Wüste vor dem COVID-19-Lockdown. Mit einem Arsenal an Aufnahmeausrüstung und Mikrofonen sind wir weit vom Blizzard-Hauptquartier fortgereist, um verschiedene Arten von Feuergeräuschen in der Wüste Kaliforniens aufzunehmen. Zum Glück war es bereits Winter und deshalb tagsüber nicht zu heiß und nachts bloß ein wenig kühl. Auch wenn es uns hauptsächlich um Feuer ging, haben wir letztendlich auch alle möglichen anderen Geräusche aufgenommen, die wir in der Produktionsphase genutzt haben: Umgebungsgeräusche, Aufprall von Steinen, Laubrascheln, Aufprall von Holz, Türenschmettern, das Knarzen einer Holzhütte, Aufprallgeräusche von Metall und Kratzgeräusche.

Zaubererfertigkeiten

Feuerblitz und Inferno

Ein paar der aufgenommenen Feuergeräusche wurden dann für die Zaubererfertigkeiten Feuerblitz und Inferno genutzt. Für die Fertigkeit Feuerblitz haben wir sanft schwelendes Feuerzischen aufgenommen, indem das Geräusch auf verschiedene Arten mit einem Feuerstab oder einem mittelgroßen, trockenen Holzscheit erzeugt und mit Sets von Mikrofonen aufgefangen haben. Sobald wir eine gute Auswahl an verschiedenen Feuergeräuschen hatten, haben wir dieses Feuerzischen editiert und bearbeitet, um es im Spiel als einmalige Audiodateien für Wirk- und Aufprallgeräusche oder als längere Soundschleifen für den Flug des Projektils zu nutzen. Wenn das Ganze dann im Spiel als Soundeffekt der Fertigkeit Feuerblitz wiedergegeben wird, erhält man ein zusammenhängendes Klangerlebnis.

Für die Zaubererfertigkeit Inferno haben wir dann andere Ausschnitte der Feueraufnahmen genommen und sie für die größere Fertigkeit so bearbeitet, dass sie aggressiver und mächtiger klingen. Wie beim Feuerblitz gibt es ein Set von Einzelgeräuschen für das Wirken, ein Set von Soundschleifen und ein weiteres Set von Einzelgeräuschen beim Zusammenziehen der Schlangenform. Es ist ziemlich cool, dass die Fertigkeit Inferno nicht einfach nur aus Feuer besteht, sondern aus Feuer in Form einer Schlange. Wegen dieser Form haben wir ein paar Freiheiten und können mehr als nur Feuer-Sounddesign nutzen. Wir haben das Fertigkeitsgeräusch mit leichten Schlangenrasseln-Spezialeffekten unterlegt, und der Ton wird zum Ende hin düsterer und ätherischer, damit es sich etwas magischer anfühlt. Wenn all diese Elemente im Spiel ausgelöst werden, wird es sich immer wie dieselbe Fertigkeit anhören, aber jedes Mal etwas anders klingen. So erhöht der Sound den Wiederspielwert. https://www.youtube.com/embed/oaU4f6mzppU?theme=light&color=white&cc_load_policy=1&HD=1&rel=0&showinfo=0

Sounddesign bei Monstern

Diablo-Spiele würden nicht so viel Spaß machen, wenn man keine Monster abschlachten könnte. Die Horden der verschiedensten Kreaturen sind einer der spaßigsten Aspekte, wenn man an einem Diablo-Spiel arbeitet. Deshalb sind Monster sowohl für experimentelles als auch für traditionelles Sounddesign perfekt geeignet. Schauen wir uns also das Sounddesign bei den Geräuschen und Stimmen der Monster an.

Monsterbewegungen

Die Mischung aus erstklassiger Animation und K.I. erfüllt die Kreaturen mit Leben und Persönlichkeit, wenn sie sich ihrer niederträchtigen Machenschaften hingeben. Zu Beginn der Audiobearbeitung für ein brandneues Monster empfehle ich den Sounddesignern immer, zuerst die Bewegungsanimationen mit Tritt- und sonstigen Bewegungsgeräuschen (wie Kleidung und Haut) zu unterlegen. Sobald eine Kreatur Tritt- und Bewegungsgeräusche hat, erwacht der Rhythmus ihrer Bewegung erst richtig zum Leben. Ab diesem Punkt sind sie meiner Meinung nach geerdet und mit der Welt verbunden. Das gibt auch vor, wie laut sie basierend auf ihrer Bewegungsmuster sein können.

Monsterstimme

Die nächste Ebene, die Kreaturen zum Leben erweckt, ist ihre Stimme. Dabei handelt es sich um das Grunzen und Brüllen, das sie ausstoßen, wenn sie den Spieler angreifen – oder die Schmerzensschreie, wenn ihr sie nacheinander ausschaltet. Die Monsterfamilien können sich ziemlich voneinander unterscheiden. Also haben wir je nach Monstertyp intensive Klangschichten von animalischen Geräuschen oder nutzen sogar alltägliche Objekte, um Geräusche zu erzeugen, die wie Kreischen oder Schreie klingen und eine zusätzliche Ebene der fertigen Stimme bilden. Manchmal engagieren wir auch einfach Kreaturen-Synchronsprecher an. Sie erschaffen den Kern der Monsterstimme, und wir können mit weiteren Geräuschen darauf aufbauen.

Das Sounddesign vom Waldwesen besteht fast komplett aus knarrendem und ächzendem Holz, dessen Geräusche wir extrem langgezogen haben, und der richtigen Auswahl an Tönen, um Emotionen zu vermitteln. Es hat viel Spaß gemacht, das Sounddesign vom Waldwesen zu entwerfen, da es größtenteils aus seltsamen, knarrenden Holzgeräuschen besteht, unterlegt von sehr tiefen menschlichen Tönen. https://www.youtube.com/embed/c8CS_6RLaZA?theme=light&color=white&cc_load_policy=1&HD=1&rel=0&showinfo=0

Ein weiteres Monster, an dem wir gerne gearbeitet haben, war der abartig großartige Fliegenwirt. Diese Bestie gebiert laufend Fliegen, die den Spieler angreifen. Am Ende haben wir ein paar unserer frühen Aufnahmen von Metzelgeräuschen genommen. Dafür hatten wir Kohlköpfe und Melonen zerrissen und zerschlagen und außerdem Mayonnaise, Salsa und einen köstlichen Schicht-Dip zu einer nicht so toll riechenden Pampe vermatscht, um ein paar ekelhafte und schleimige Geräusche für unser Sounddesign zu erzeugen. https://www.youtube.com/embed/WvXKYrbOBlQ?theme=light&color=white&cc_load_policy=1&HD=1&rel=0&showinfo=0

Umgebungsgeräusche der offenen Welt

Ein grundlegendes Prinzip beim Sound von Diablo IV ist „lebendiges Audio“. Das bedeutet, dass die Klanglandschaft sich stets entwickelt und niemals statisch bleibt. Dieses Prinzip ist tief in den verschiedenen Variationen der Sounddesigns verwurzelt, die wir für alle möglichen Klänge kreieren. Das gilt auch für die Echtzeitwiedergabe im Spiel, insbesondere bei der Umgebung. Da die riesige offene Welt eine zentrale Rolle spielt, wollten wir die Umgebungsgeräusche so detailliert wie möglich machen. Wir finden sie ebenso wichtig wie das Sounddesign der Helden. Für dieses Prinzip ist es wichtig, dass sich die Geräusche und Systeme mit der Zeit subtil verändern. Wir arbeiten immer darauf hin, dass die subtilen Veränderungen der Umgebungsgeräusche (die man womöglich kaum bemerkt) sich selten wiederholen und insgesamt natürlicher und immersiver anfühlen.

Das World Building-Team hat großartige Arbeit dabei geleistet, die Regionen optisch zu füllen und uns somit tonnenweise Inspiration für immersiven Umgebungsgeräusche zu geben.

Da Spieler sich womöglich sehr lange in der offenen Welt aufhalten, wollten wir jeder Außenregion eine einzigartige Klangumgebung schenken, in der es mit der Zeit auch subtile Veränderungen der Geräusche gibt. Um das zu erreichen, nutzen wir Audiosysteme wie Echtzeit-Okklusion, hochwertige Halleffekte und Verzögerungseffekte/Echos, die auf die Umgebung reagieren.

Hier zeigen wir euch ein paar längere Aufnahmen aus dem Spiel mit einem statischen Ausschnitt, damit ihr hören könnt, wie die Umgebungsgeräusche sich mit der Zeit verändern. Damit wollen wir euch nicht nur cooles Sounddesign für die Umgebung zeigen, sondern euch diese Aufnahmen auch für Pen-&-Paper-Sessions zur Verfügung stellen – oder einfach zur Untermalung, wenn ihr euch in eure Arbeit vertieft. Diese Ausschnitte bestehen aus Aufnahmen von 5–6 Minuten, die mit Soundschleifen fast eine Stunde dauern. https://www.youtube.com/embed/0RDwMOxZqsY?theme=light&color=white&cc_load_policy=1&HD=1&rel=0&showinfo=0 https://www.youtube.com/embed/wnez77GvFpU?theme=light&color=white&cc_load_policy=1&HD=1&rel=0&showinfo=0 https://www.youtube.com/embed/JRdkkd4BdYg?theme=light&color=white&cc_load_policy=1&HD=1&rel=0&showinfo=0

Umgebungsgeräusche der Dungeons

Um die richtige Atmosphäre beim Metzeln in den Dungeons von Diablo zu erzeugen, ist es uns ein besonderes Vergnügen, verschiedene und einzigartige Klangerlebnisse zu erschaffen, damit ihr komplett in die Spielwelt eintauchen könnt. Im Vergleich zur neuen offenen Welt sind die Umgebungsgeräusche der Dungeons etwas weniger intensiv, da wir euch nicht von einer der spaßigsten Aktivitäten von Diablo ablenken wollen: Dungeons erkunden. Das ist ein Gebiet, das uns mehr Freiheiten erlaubt, um tief in die höllischen und gruseligen Klangwelten einzutauchen, während die Monster auf dem Bildschirm das Klangerlebnis begleiten. Für Diablo IV gehen wir es in Dungeons mit dem Grundsatz „Was ihr hört, bekommt ihr auch.“ etwas realistischer an. Mit langgezogenen Halleffekten und Geräuschokklusion wollen wir eure Aufmerksamkeit darauf lenken, was hinter der nächsten Ecke lauern könnte, und euch mental auf die nächste Ladung an Feinden vorbereiten.

Zerstörbare Objekte

In den Dungeons sind zahlreiche zerstörbare Objekte verstreut. Das Interactives-Team hat für Diablo IV hunderte unglaublich detaillierte zerstörbare Objekte geschaffen. Um dem Detailreichtum bei ihrer Zerstörung Rechnung zu tragen, wollten wir jeden einzelnen Splitter und Brocken mit glaubwürdigem physikalischen Audio versehen. In Diablo Objekte zu zerstören, sollte genau so glaubwürdig und befriedigend klingen, wie Monster zu töten. Wir haben uns viel Mühe gegeben, allen Objekten ein extrem befriedigendes Zerstörungsgeräusch zu verpassen. Zugleich erhalten die Trümmer winzige Töne, die die Einzelteile begleiten, wenn sie abbrechen und durch den Raum fliegen. Ich bin immer noch beeindruckt von den ganzen Details, die wir bei zerstörbaren Objekten in Diablo IV haben. Wenn ich einen Raum voll mit solchen Objekten sehe, liebe ich es, einfach drauf los zu schlagen! https://www.youtube.com/embed/xdjU8sAG-Vc?theme=light&color=white&cc_load_policy=1&HD=1&rel=0&showinfo=0

Mischung im Spiel

Zu guter Letzt möchte ich ein wenig über die isometrische Kamera sprechen. Sie stellt einen vor interessante Herausforderungen, wenn man alle Elemente des Spiels zusammenbringen will. Da man das Schlachtfeld aus einem bestimmten Winkel und aus einer bestimmten Entfernung betrachtet, müssen wir dafür sorgen, dass die Monster auf dem Bildschirm Geräusche von sich geben, ohne dass die Gesamtmischung insgesamt zu überladen oder zu leer klingt. Unter Berücksichtigung der Prioritäten der Spieler gibt es viel Hin und Her bei der Klangwiedergabe in Echtzeit.

Für Diablo IV können wir die Soundmischung in Echtzeit mehr lenken als je zuvor. Aufgrund der isometrischen Kameraansicht muss alles, das ihr seht, Geräusche erzeugen. Aber wir wollen auch, dass ihr euch auf die wichtigsten Geräusche konzentriert, die eure Aufmerksamkeit verlangen. Wir feilen an Audiomischungen und einem System, das den Fokus auf die wesentlichen Töne lenkt, damit die wichtigsten Monstergeräusche hervorstechen, wenn es nötig ist. Es ist schwer, eine klare Audiomischung zustande zu bringen, wenn es im Spiel mehrere Helden und viele verschiedene Monster auf dem Bildschirm gibt. Da wir zugleich detaillierte Hintergrundklänge haben, müssen wir je nach Situation verschiedene Audiomischungen kreieren.

Wir hoffen, dass euch dieser kleine Einblick in das Sounddesign von Diablo IV gefallen hat. Es gibt noch so viel mehr zu erzählen, aber leider müssen wir das auf ein anderes Mal verschieben. Wir freuen uns über jegliches Feedback zu allem, was ihr in den Videos gehört oder in diesem Quartalsupdate gelernt habt. Danke, dass ihr euch die Zeit genommen habt, um mehr über die Klanglandschaft von Diablo IV zu erfahren!

Kris Giampa,
Sound Supervisor, Diablo IV

ML Sample Generator Project | Phase 2 pt3

Convolutional Networks

Convolutional networks include one or more convolutional layers. These layers are typically used for feature extraction. Stacking multiple on top of each other often can extract very detailed features. Depending on the input shape of the data, convolutional layers can be one- or multidimensional, but are usually 2D as they are mainly used for working with  images.  The  feature extraction can be achieved by applying filters to the input data. The image below shows a very simple black and white (or pink & white) image with a size 3 filter that can detect vertical left-sided edges. The resulting image can then be shrinked down without losing as much data as reducing the original’s dimensions would.

2D convolution with filter size 3 detecting vertical left edges

In this project, all models containing convolutional layers are based off of WavGAN. For this cutting the samples down to a length of 16384 was necessary, as WavGAN only works with windows of this size. In detail, the two models consist of five convolutional layers, each followed by a leaky rectified linear unit activation function and one final dense layer afterwards. Both models were again trained for 700 epochs.

Convolutional Autoencoder

The convolutional autoencoder produces samples only in the general shape of a snare drum. There is an impact and a tail but like the small autoencoders, it is clicky. In contrast to the normal autoencoders, the whole sound is not noisy though but rather a ringing sound. The latent vector does change the sound but playing the sound to a third party would not result in them guessing that this should be a snare drum.

Ringy conv ae sample
GAN

The generative adversarial network worked much better than the autoencoder. While still being far from a snare drum sound, it produced a continuous latent space with samples resembling the shape of a snare drum. The sound itself however very closely resembles a bitcrushed version of the original samples. It would be interesting to develop this further as the current results suggest that there is just something wrong with the layers, but the network takes very long to train which might be due to the need of a custom implementation of the train function.

Bitcrushed sounding GAN sample

Variational Autoencoder

Variational autoencoders are a sub-type of autoencoders. Their big difference to a vanilla autoencoder is the encoder’s last layer, the sampling layer. With this, variational autoencoders always provide a continuous latent space, which is much better for generative models than just to sample from what has been provided. This is achieved by having the encoder output two different vectors instead of one: one for standard deviation and one for the mean. This provides a distribution rather than a single point, leading to the decoder learning that an area is responsible for a feature and not a single sample.

Training the variational autoencoder was especially troublesome as it required a custom class with it’s own train step function. The difficulty with this type of model is that the right mix between reconstruction loss and kl loss has to be found, otherwise the model produces unhelpful results. The currently trained models all have a ramp up time of 30,000 batches until full effect of the kl loss. This value gets multiplied by a different actor depending on the model. The trained versions are with a factor of 0.01 (A), 0.001(B), as well as 0.0001(C). Model A produces a snare drum like sound, but is very metallic. Additionally instead of having a continuous latent space, the sample does not change at all. Model B produces a much better sample but still does not include much changes. The main changes are the volume of the sample as well as it getting a little bit more clicky towards the edges of the y axis. Model C has much more different sounds, but the continuity is more or less not present. In some areas the sample seems to get slightly filtered over one third of the vector’s axis but then rapidly changes the sound multiple times over the next 10%. But still, out of the three variational autoencoders model C produced the best results.

VAE with 0.01 contribution (A) sample
VAE with 0.001 contribution (B) sample
VAE with 0.0001 contribution (C) sample

Next Steps

As I briefly mentioned before, this project will ultimately run on a web server which means the next steps will be deciding how to run this app. Since all of the project has been written in python so far Django would be a good solution. But since TensorFlow offers a JavaScript Library as well this is not the only possible way to go. You will find out more about this in the next semester.

ML Sample Generator Project | Phase 2 pt2

Autoencoder Results

As mentioned in the post before I have trained nine autoencoders to (re)produce snare drum samples. For easier comparison I have visualized the results below. Each image shows the location of all ~7500 input samples.

Rectified Linear Unit
Small relu ae
Medium relu ae
Big relu ae

All three graphics portray how the samples are mostly close together but some are very far out. A continuous representation is with all three models not possible. Reducing the latent vector’s maximum on both axes definitely helps, but even then the resulting samples are not too pleasing to hear. The small network has clicks in the beginning and generates very silent but noisy tails after the initial impact. The medium network includes some quite okay samples but moving around in the latent space often   produces   similar  but  less   pronounced issues as the small network. And the big network produces the best sounding samples but has no continuous changes.

Clicky small relu sample
Noisy medium relu sample
Quite good big relu sample
Hyperbolic Tangent
Small tanh ae
Medium tanh ae
Big tanh ae

These three networks each produce different patterns with a cluster at (0|0). The similarities between the medium and the big network lead me to believe that there is a smooth transition between random noise, to forming small clusters, to turning 45° clockwise and refining the clusters when increasing the number of trainable parameters. Just like the relu version, the reproduced audio samples of the small network contain clicks. The samples are however much better. The medium sized network is the best one out of all the trained models. It produces  mostly  good  samples  and has a continuous latent space. One issue is however that there are still some clicky areas in the latent space. The big network is the second best overall as it mostly lacks a continuous latent space as well. The produced audio samples are however very pleasing to hear and resemble the originals quite well.

Clicky small tanh sample
Close-to-original medium tanh sample
Close-to-original big tanh sample
Sigmoid
Small sig ae
Medium sig ae
Big sig ae

This group shows a clear tendency to cluster up the more trainable parameters exist. While in the above two groups the medium and the big network produced better results, in this case the small network is by far the best. The big network delivers primarily noisy audio samples and the medium network very noisy ones as well but they are better identifiable as snare drum sounds. The small network has by far the closest sounds to the originals but produces clicks at the beginning as well.

Clicky small sigmoid sample
Noisy medium sigmoid sample
Super noisy big sigmoid sample

In the third part of this series we will take a closer look at the other models.

ML Sample Generator Project | Phase 2 pt1

A few months ago I already explained a little bit about machine learning. This was because I started working on a project involving machine learning. Here’s a quick refresh on what I want to do and why:

Electronic music production often requires gathering audio samples from different libraries, which, depending on the library and on the platform, can be quite costly as well as time consuming. The core idea of this project was to create a simple application with as few as possible parameters, that will generate a drum sample for the end user via unsupervised machine learning. The interface’s editable parameters enable the user to control the sound of the generated sample and a drag-and-drop space could map a dragged sample’s properties to the parameters. To simplify interaction with the program as much as possible, the dataset should only be learned once and not by the end user. Thus, the application would work with the models rather than the whole algorithm. This would be a benefit as the end result should be a web application where this project is run. Taking a closer look at the machine learning process, the idea was to train the network in the experimentation phase with snare drum samples from the library noiiz. With as many different networks as possible, this would then create a decently sized batch of models from which the best one could be selected for phase 3.

So far I have worked with four different models in different variations to gather some knowledge on what works and what does not. To evaluate them I created a custom GUI.

The GUI

Producing a GUI for testing purposes was pretty simple and straight-forward. Implementing a Loop Play option required the use of threads, which was a little bit of a challenge but working on the Interface was possible without any major problems thanks to the library PySimpleGUI. The application worked mostly bug free and enabled extensive testing of models and also already saving some great samples. However, as it can be seen below, this GUI is only usable for testing purposes and does not meet the specifications developed in the first phase of this project. For the final product a much simpler app should exist and instead of being standalone it should run on a web server.

Autoencoders

An autoencoder is an unsupervised learning method where input data is encoded into a latent vector (therefore the name autoencoder). To get from the input to the latent vector multiple dense layers reduce the dimensionality of the data, creating a bottleneck layer and forcing the encoder to get rid of less important information. This results in data loss but also in a much smaller representation of input data. The latent vector can then be decoded back to produce a similar data sample to the original. While training an autoencoder, the weights and biases of individual neurons are modified to reduce data loss as much as possible.

In this project autoencoders seemed to be a valuable tool as audio samples, even though as short as only 2 seconds, can add up to a huge size. Training with an autoencoder would reduce this information down to only a latent vector with a few dimensions and the trained model itself, which seems perfect for a web application. The past semester resulted in nine different autoencoders, each containing dense layers only. All autoencoders differ from each other by either the amounts of trainable parameters, or the activation functions, or both. The chosen activation functions are rectified linear unit, hyperbolic tangent and sigmoid. These are used in all of the layers of the encoder as well as all layers of the decoder except for the last one to get back to an audio sample (where individual data points are positive and negative). 

Additionally, the autoencoders’ size (as in the amount of trainable parameters) is one of the following three: 

  • Two dense layers with units 9 and 2 (encoder) or 9 and sample length (decoder) with trainable parameters
  • Three dense layers with units 96, 24 and 2 (encoder) or 24, 96 and sample length (decoder) with trainable parameters
  • Four dense layers with units 384, 96, 24 and 2 (encoder) or 24, 96, 384 and sample length (decoder) with trainable parameters

Combining these two attributes results in nine unique models, better understandable as a 3×3 matrix as follows:

Small (2 layers)Medium (3 layers)Big (4 layers)
Rectified linear unitAe small reluAe med reluAe big relu
Hyperbolic tangentAe small tanhAe med tanhAe big tanh
SigmoidAe small sigAe med sigAe big sig

All nine of the autoencoders above have been trained on the same dataset for 700 epochs. We will take a closer look on the results in the next post.

INDEPTH Sound Design

Indepth Sound Design ist ein Sound Design Channel auf Youtube, der sich mit der Philosophie und den techniken des Sound Designs beschäftigt. Dafür werden Beispiele aus echten Filmen gezeigt und erklärt. Indepth Sound Design beschreibt sich selbst als eine Fundgrube für lehrreiche Sound-Dekonstruktionen, Audio-Stem-Breakdowns und andere klangliche Inspirationen. Die Seite wurde von Mike James Gallagher ins Leben gerufen.

Beispiele für Sound Design Dekonstruktion:

In diesem Beispiel wird auf den Film Independence Day eingegangen, wobei der Sound in die verschiedenen Layers aufgebrochen wird. Die Szene ist 3:45 lang und wird 4-mal gespielt.

Zuerst mit nur den Sound Effects, dann nur Dialog und Foley, anschließend nur die Music und zuletzt alles zusammen im Final Mix.

Im zweiten Beispiel geht es um eine 1:09 min lange Szene aus Terminator 2. Auch diese Szene wir mit den Layers Sound FX, Ambience, Foley, Music und Final Mix separat gezeigt.

Außerdem spricht im Anschluss der Sound Designer des Films Gary Rydstrom über den Entstehungsprozess des Sound Designs bei dieser Szene.

Quelle:

Indepth Sound Design

https://www.youtube.com/channel/UCIaYa00v3fMxuE5vIWJoY3w

How Music Producers Find Their “Sound”

Do you catch yourself recognising whose track/song you are listening to when you’re just shuffling randomly through Spotify, even before you look at the artist name? This is because successful music producers have a way to make sure you can instantly recognise them. This is quite beneficial, because it imprints into the listener’s mind and makes them more likely to recognise and share the artist’s future releases with their network.

So how do musicians/music producers do this? There are some key points that can easily help you understand this occurence better.

1) There’s no shortcut! 

You know the 10.000 hour rule? Or as some have put it in the musical context- 1,000 songs? There’s really no way around it! This aplies to any skill in life, not just music. However, usually the end consumer never really knows how many songs an artist actually never releases. Those are all practice songs. For every release that you see out there there might be 100s of other unreleased songs done prior to it. if the musician just keeps creating instead of getting hung up on one song, they will eventually grow into their own unique way of structuring, as well as editing songs.

2) They use unique elements 

So many producers/musicians use samples from Splice, which leads to the listener feeling like they’ve already heard a song even if they haven’t. Songs get lost in the sea of similar musical works, but every now and then, something with a unique flavour pops up and it’s hard to forget. Musicians who make their own synth sounds, play exotic instruments or even their own dit instruments are the ones that stick around in our minds.

3) Using the same sound in multiple songs

This is the easiest and most obvious way in which musicians/producers show their own style. You might hear a similar bass, or drum pattern in mutiple songs/tracks from the same musician. In rap/hiphop, you will also hear producer tags (e.g. “Dj Khaled” being said in the beginning of each track).

4) Great Musicians/Producers don’t stick to one style/trend

Music has existed for so long and progressed so fast lately, that it is hard to stand out, especially if you stick to genres strictly. Nowadays, great musicians will come up with their own subgenres or mix in few different ones into a musical piece. You won’t ever really remember the musicians or the producers who are just following in the footsteps of the greats who have already established a certain genre. If you can’t quite put your finger on why you like someone’s music so much and why they sound “different”, they are probably experimenting with a combination of different genres.

Harmor

The Basics

The picture above shows Harmor’s interface. We can group the Interface into three sections: The red part, the gray part and the window to the right. Firstly, the easiest section to understand is the window to the right. Harmor is an additive synthesizer, which means the sounds it generates are made up of sine waves added on top of each other. The window on the right displays the frequencies of the individual sine waves, played over the last few seconds. Secondly, the red window is where most of the sound is generated. There are different sections and color-coded knobs to be able to identify what works together. Left of the center you can see an A/B switch. The red section exists twice: once for state A and once for state B. These states can be mixed together via the fader below. Lastly the gray area is for global controls. The only exception is the IMG tab, which we will cover a little later. As you can see there are many knob, tabs and dropdowns. But in addition to that most most of the processing can be altered with envelopes. These allow the user to draw a graph with infinitely many points to either use it as an ADSR curve, an LFO, or map it to keyboard, velocity, X, Y & Z quick modulation and more. At this point it already might become clear that Harmor is a hugely versatile synth. It’s marketed as an additive / subtractive synthesizer and features an immense amount of features which we will take a closer look at now.

Additive or Subtractive?

As mentioned above Harmor is marketed as an additive / subtractive synthesizer. But what does that mean? While Harmor is built using additive synthesis as its foundation, the available features closely resemble a typical subtractive synth. But because Harmor is additive, there are no audio streams being processed. Instead a table of frequency and amplitude data is manipulated resulting in an efficient, accurate and partly very unfamiliar and creative way to generate audio streams. Harmor features four of these additive / subtractive oscillators. Two can be seen on the image above in the top left corner. These can be mixed in different modes and then again mixed with the other two via the A/B switch. In addition to the four oscillators, Harmor is also able to synthesize sound from the IMG section. The user can drag-and-drop audio or image files in and Harmor can act like a sampler, re-synthesizing audio or even generating audio from images drawn in Photoshop.

The Generator Section

As you can see in addition to the different subsections being walled in by dotted lines, this section is color coded as well. The Timbre section allows you to select any waveform by again drawing and then morphing between two of them with different mixing modes. Harmor allows you to import a single cycle waveform to generate the envelope. But you can import any sample and generate a waveform from it. Here is an example where I dragged a full song into it and processed it with the internal compressor module only:

The blur module allows you to generate reverb-like effects and also preverb. Tremolo generates the effect of a stereo vibrato, think about jazz organs. Harmonizer clones existing harmonics by the offset/octaves defined. And prism shifts partials away from their original relationship with the fundamental frequency. A little prism usually generates a detune-like effect, more usually metallic sounds. And here is the interesting part: As with many other parameters as well, you can edit the harmonic prism mapping via the envelopes section. This allows you to create an offset to the amount knob on a per frequency basis. Here is an example of a usage of prism:

As you can see in the analyzer on the right: There is movement over time. In the Harmonic prism envelope I painted a graph so that the knob does not modify lower frequencies but only starts at +3 octaves.
The other options from this section, unison, pitch, vibrato and legato should be clear from other synthesizers.

The Filter Section

As seen above, Harmor features two filters per state. Each filter can have a curve selected from the presets menu. The presets include low pass, band pass, high pass and comb filtering. Additionally you can draw your own curve as explained in the Basics section above. The filters can additionally be control the mix for the envelope, keyboard tracking, width, actual frequency and resonance. But the cool thing is how these filters are combined: The knob in the middle lets you fade between only filter 2, parallel processing, only filter 1, filter 1 + serial processing and serial processing only. In the bottom half there is a one-knob pluck knob as well as a phaser module with, again, custom shaped filters.

The Bottom Section

As you can see above the bottom section features some general global functions. On the left side most should be clear. The XYZ coordinate grid offers a fast way to automate many parameters by mapping them to either X Y or Z and then just editing events in the DAW. On the top right however there are four tabs that open new views. Above we have seen the ENV section where you can modulate about anything. The green tab is the image tab. We already know that Harmor can generate sound from images and sound (not that this is a different way of using existing sound, before I loaded it into an oscillator, now we are talking about the IMG tab). On the right you can see a whole lot of knobs, some of them can be modified by clicking in the image. C and F are course and fine playback speed adjustments, time is the time offset. The other controls are used to change how the image is interpreted and partially could be outsourced to image editors. I’m going to skip this part, as this post would get a whole lot more complicated if not. It would probably be best to just try it out yourself.

The third tab contains some standard effects. These are quite good but especially the compressor stands out as it rivals the easy-but-usefullness of OTT.

And finally, the last section: Advanced (did you really think this was advanced until now? :P) Literally the whole plugin can be restructured here. I usually only go in here to enable perfect precision mode, threaded mode (enables multi core processing) and high precision image resynthesis. Most of these features are usually not needed and seem more like debugging features so I will not go into detail about them, but like before I encourage you to try it out. Harmor can be very overwhelming and as many people mention in reviews: “Harmor’s biggest strength is also it’s greatest weakness, and probably why there are so few reviews for such an amazing synth. You can use Harmor for years, and still feel like a noob only scratching the surface. That makes writing a review difficult. How can you give an in-depth review, when you feel so green behind the ears? You only need to watch a few YT videos (e.g. Seamless) or chat with another user to discover yet another side to this truly versatile beast.”

Harmor on KVR ⬈
Harmor on Image-Line ⬈
Harmor Documentation ⬈ (a whole lot more details and a clickable image if you have more detailed questions)

Sound Design – What Does Magic Sound Like? A Look At How The Harry Potter Films Redefined The Sound Of Magic

Here is an interesting video on the sound design of magic in the Harry Potter series of films.

Before Harry Potter this video suggests that although there were some indications in literature as to what magic might sound like, that until the Harry Potter films came along the medium of film never seen such formalisation of the sound of magic, such a variety of spells cast with specific gestures and feelings. If the film makers didn’t quite know what that should all sound like they definitely knew that they didn’t want it to sound like shooting scenes from science fiction films.

In preparation fro the first Harry Potter film director Chris Columbus told supervising sound editor Eddy Joseph that he didn’t want anything modern, futuristic or electronic. Although the sound of magic did change and develop throughout the series of films, it is said that this was a mantra that the film makers and sound designers continued to hold to.

Instead if the spell that was being cast had a specific sound related to it then they would use that, like water, fire, freezing, etc. Sometimes the sound of what the spell is impacting is all that is needed. When it comes to levitation then silence works just fine. But there are plenty of examples where the magic doesn’t have a specific sound attached and this is where the sound designers get the chance to be creative.

There is no doubt that the sound of magic developed though the Harry Potter films but there was a major change when it came to to the 3rd film, The Prisoner of Azkaban, when out went the explosions and whooshes and in came much softer sounds for most of the spells, which has the effect of making the magic less aggressive and more mysterious and that is the style the team build on for the key patronus spell that is built out a chorus of voices.

Another development we see through the Harry Potter films is that see the spell sounds become more personal and appropriate for each character to give the impression that the spell comes out of the magician just like their breath.

Watch the video and hear and see the examples played out.