Print experiment: “reality is analog”, part III–hand set lettering

Altough the printing method using movable letters has already been known in Eastern parts of the world it was the German goldsmith Johannes Gutenberg who improved this technique in 1450 which lead to a revolution in print setting and production of books and thus made the spread of information and knowledge available to a broader public. Before Gutenberg’s invention, in Europe it was the job of clerics to write and design (religious) stories and especially copies of the bible by hand, which of course was a slow but also quite expensive process. Due to this only the very wealthy part of the population was able to afford books and the contents they conveyed.

Compared to nowadays spread of information Gutenberg’s invention was also very slow and expensive, but his invention did not only speed up the reproduction of knowledge–by giving craftsmen the possibility to produce books and newspapers, the catholic church subsequently lost control over publishing and thus knowledge and science, leading to an empowerment of the bourgeoisie.

For over 500 years then, the method of letterpress printing was the predominant form to combine texts with woodcuts and later linocuts, or metallic printing plates.

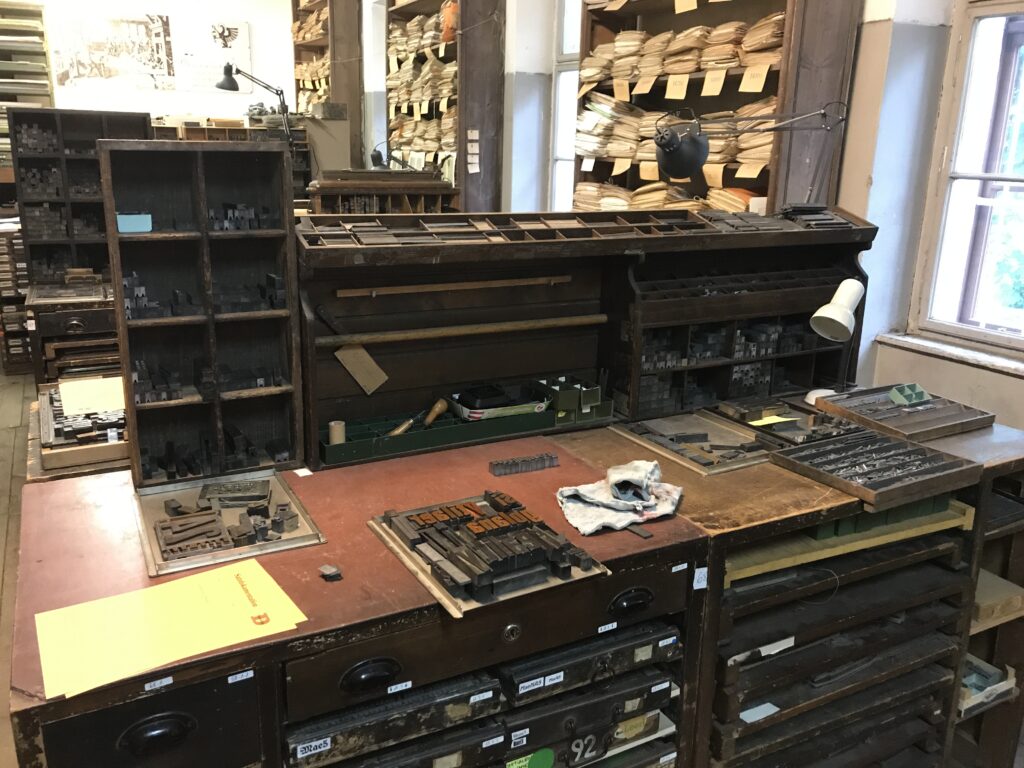
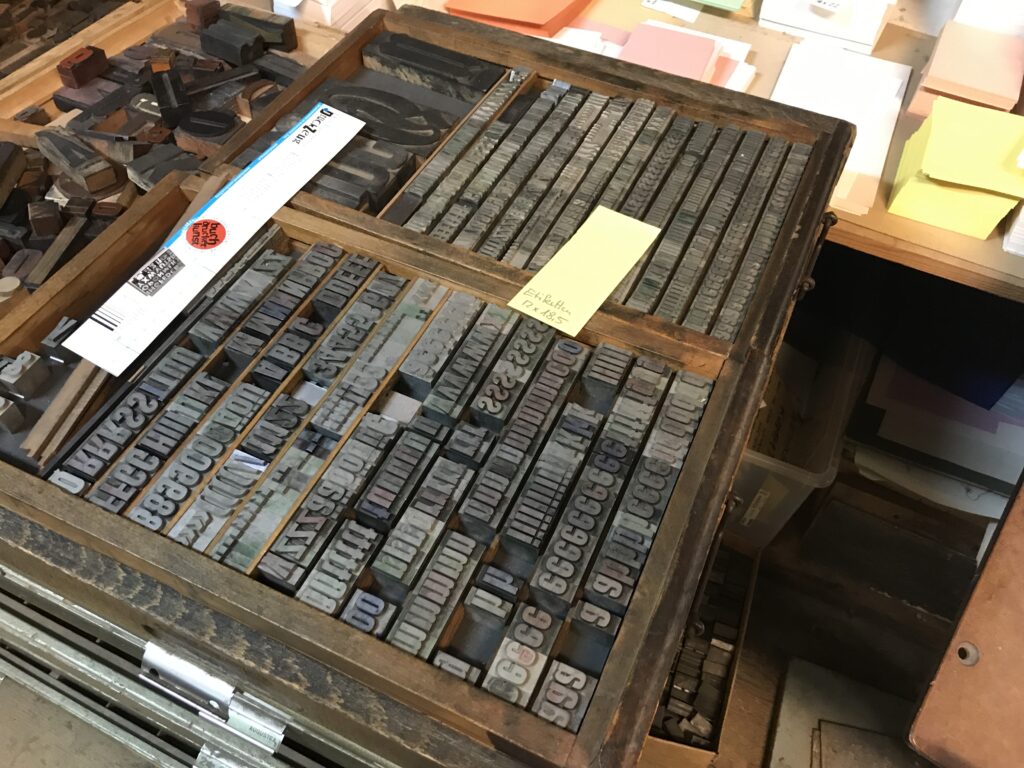
In Graz the Druckzeug is the local museum for antique and 20th century printing techniques, that besides numerous printing machines holds a huge collection of wooden and lead letters. In addition to the moveable letters in various fonts, sizes and cuts, the typeset workshop is fully equipped with spacebands and leads, as well as all the tools you need to prepare everything from a single one word lettering, abstract type-sets and full page texts for your personal letterpress print experience.

Browsing through Allez hopp! Buchstaben aufräumen : die Handsatzschriften in der Buchdruckerei Alexander Bauer, Graz by IND10 student Ursula Bogner, a font catalog containing the biggest part of fonts and typefaces available at Druckzeug, you can learn more about the history, categorization and use of the fonts. Besides depiction of the typefaces the catalog also contains a register in which drawer you will find the various fonts.

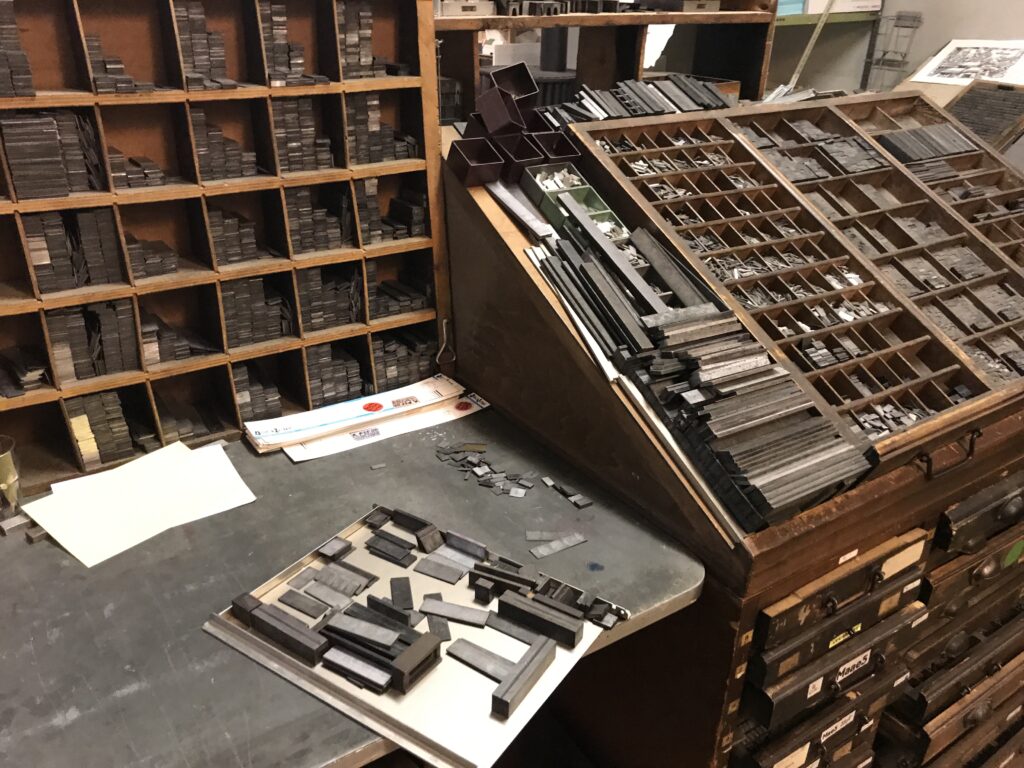
At first for my experiment I planned to test four to five different fonts, but soon found out that not every font provides a complete set of letters and also you won’t find every cut or font size that you would need for your desired printing purpose.

Besides, for the unexperienced type setter, working with hand set letters is another quite time consuming and intense work–first you need to pick out the letters you need for your text, then find suitable spacebands and fill your set with non printing pieces of normed lead to fix your letters, so they won’t fly away during the print run. In addition you should always keep in mind that after printing you have to put back in place every piece you used!

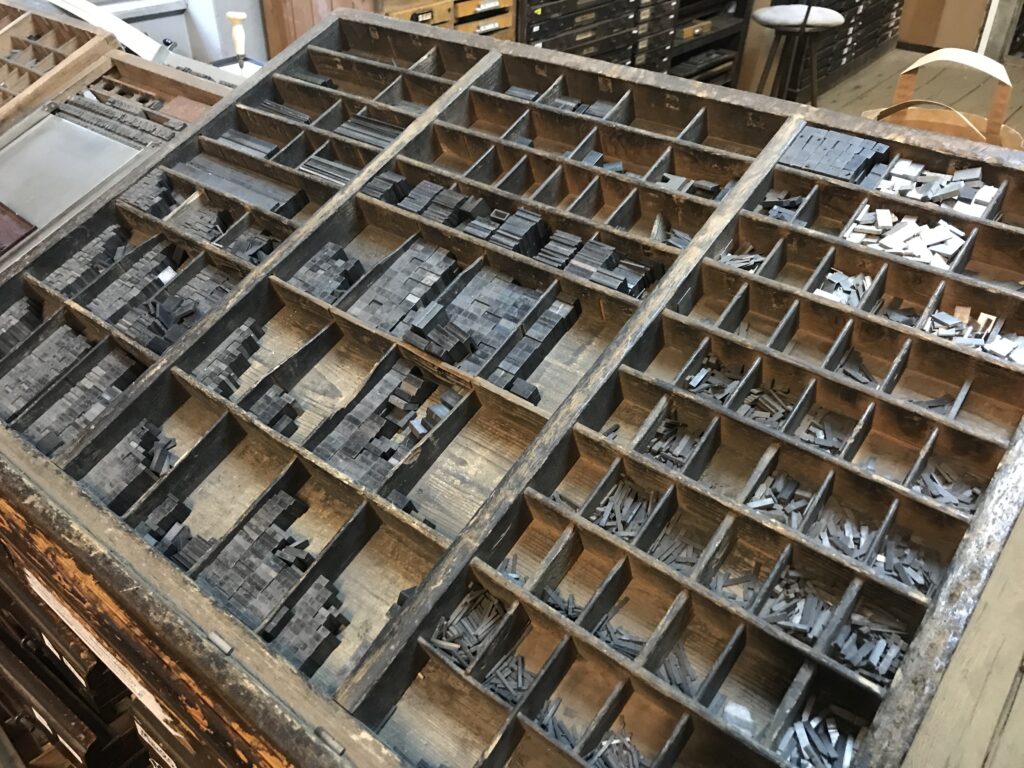
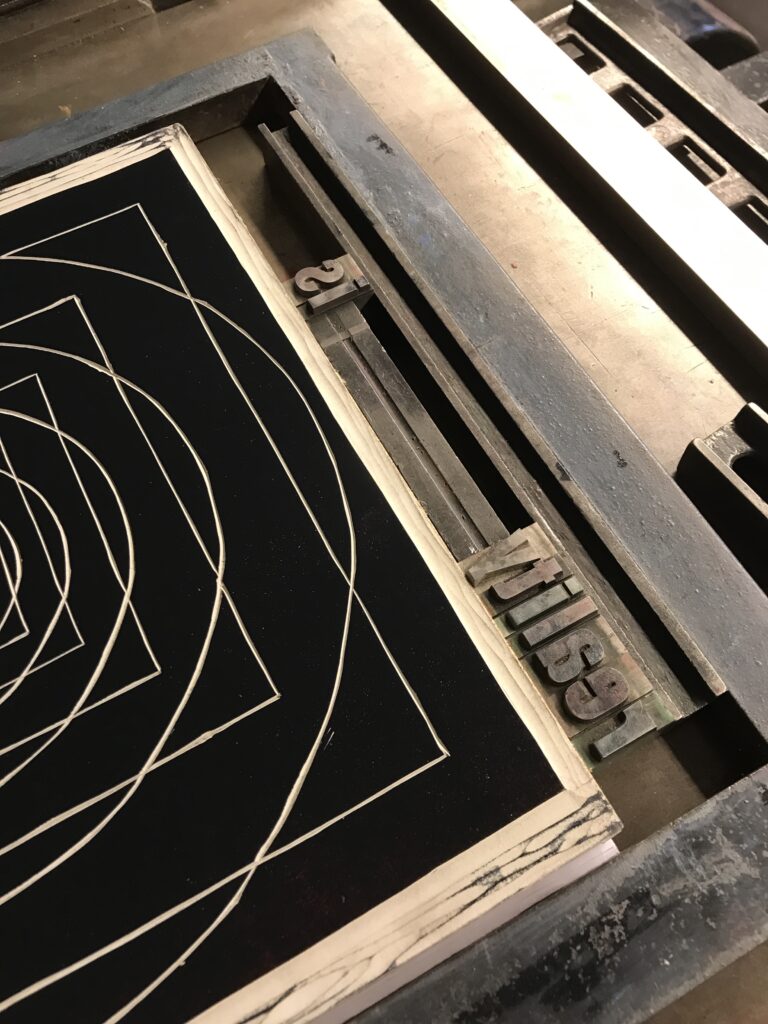
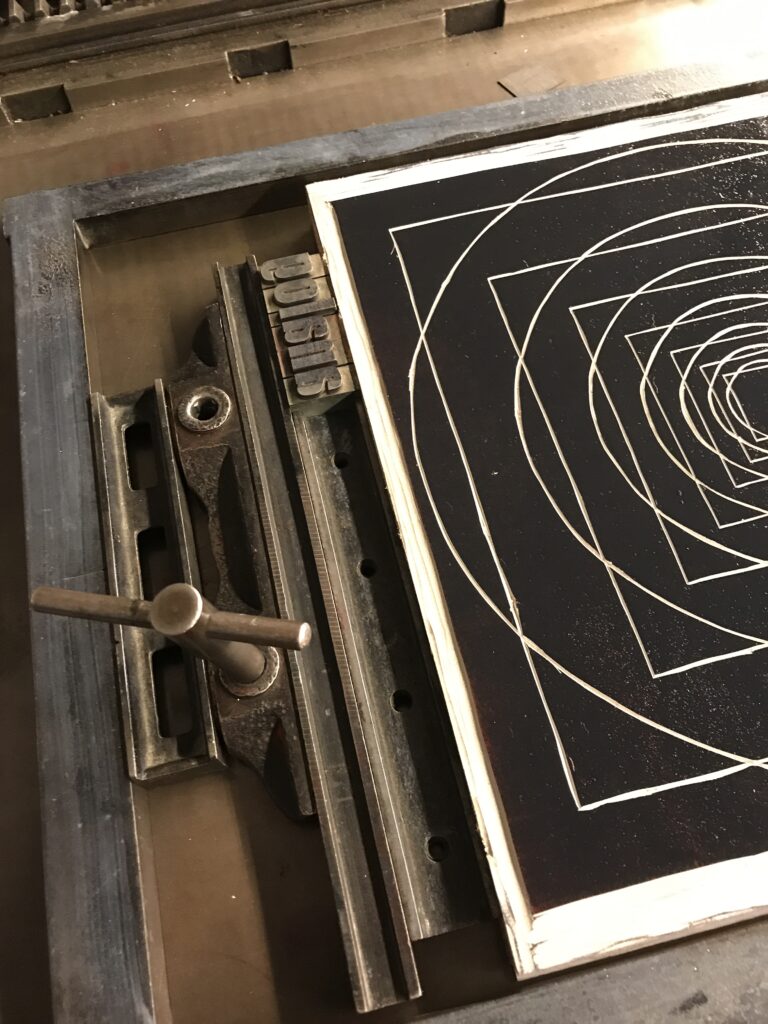
So in general it’s good to think about font, cut and size first and to begin with this printing method it’s a great deal to keep it simple, as the more material you use, the more adjustments you will need for a proper printing image. (Not only that various fonts may have slightly different printing heights, you will find that especially bigger wooden letters need a lot of adjustments as they can be rather worn, resulting in a vintage print look).

However, I finally decided to use a set of 14pt Akzidenz Grotesk regular as well as (assumably) 60pt Anzeigen-Grotesk bold to test some arrangements and layouts for the proof press.

In general the method working with single letters and truly manual spacing seemed to give another perspective for typography, but also for the necessity of white space and it’s arrangement. On the one hand the use of physical letters sharpens the perception of typographic characteristics, while creating an awareness for the advantages of well made digital fonts. Secondly, the use of standardized sizes of fonts and leads, provides a rather intuitive approach to efficient use of spacing and proportions, compared to seemingly unlimited possibilities offered by a screen based layout.

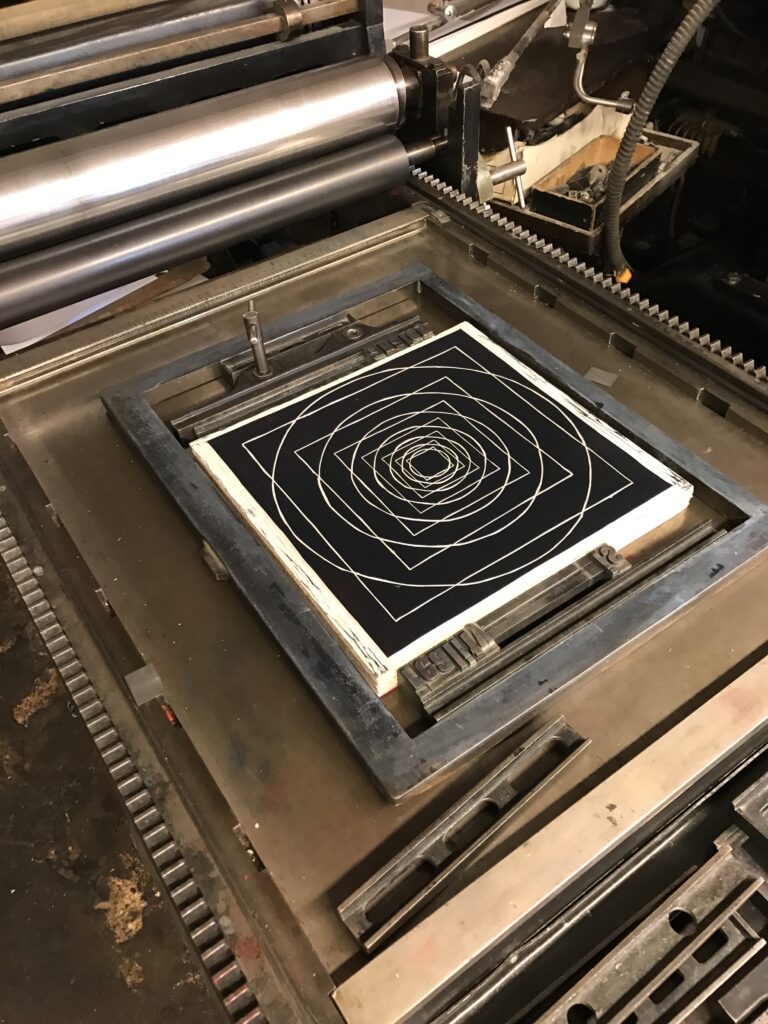
However, compared to working on the digital desktop, to see the result of your letterset it’s even more important to make a proof print–first of all, only the proof print will reveal the right reading direction as the printing letters are always mirror-inverted. Additionally the font size of the letters appear bigger in their physical than in printed state. And of course, while you can add spacing to your letter set before the first print, only the print will show if spacing is used properly.

In the case of my experiment, although some adjustment in spacing between the letters was need, the typefaces turned out to be a great choice as the lead letters still had sharp edges for a clean and clear printing image.

To see the printed results, look out for part four of the experiment: proof press.

Sources:
https://de.wikipedia.org/wiki/Buchdruck

BPE of Science centers in Austria 1

I will continue the exploration of a few Best Pratice Examples (BPE) by showing in those 2 articles an analysis of two science centers I had the chance to visit here before lockdown in Graz and Salzburg.

The COSA Science Center of Graz

In december, I could go through the COSA science center of Graz during around 2 hours. Unfortunately, I could’nt access to the AR/VR part because of covid restriction, but I could go through the main rooms and get the main idea of the museum here.

Entry of the COSA building. On the yellow print you can have an overview of the topics presented in the science center.

There are different rooms in the COSA Center. In the Experimentarium, you can find a lot of hands on approaches and explanations about scientific phenomenas. I’ll detail the medecine experince presented in the cosa MedLab. You can also learn about technology and how are made cars.

I could only attend those, but the science center also proposes special exhibitions and contents through the COSA Plus program and COSA community. Those are social events when you can talk to different partners or guests, and there is also some special workshops and sciences show where professional can explain experiments.

Example of Science Show of the COSA museum
Cosa Community place where you can seat, discuss and practice hands-on experiments

The Experimentarium

We accessed the exhibit with a guide and an other familie. He explained us a bit about the content of each room and then we could go through the content freely and separated from the other familie and guide due to the corona situation.

Entrance of the exploratorium room

Hands-on best practice example : learn how to be a doctor in the MedLab

Material to start the experience

When entering this room I was particularly interested in this hands-on play approach where you are supposed to play a doctor. I was really impressed by the realism and details it got, and It really reminded me some parts of my previous biology cursus. This experience starts with this desk where you can pick up a pencil and a tablet. Then you can enter the rooms where sits the patients and pick one of them to play the doctor with.

First I took the paper here, then I went next to the patient and put the headphones on. When putting it ou can hear the story of the patient. Mine went trough a journey in the wild and went back with terrible stomachaches.

Detail paper of the patient where you can collect informations for further analysis
Monitor next to the patient

In the headphone it is explained that you can write the informations here and you have to take a blood sample. This part was really funny because the model had fake blood in it and I could really take something from its body so it added realism in the gesture.

Then, you have to enter to the analysis where you will have to make some research with the sample, and gather information.

Pictures of the hands-on experiment on the website

I knew how to proceed until this step but got a little blocked through the analysis room. I remember that I didn’t understood how to analyze the blood sample, I was quite afraid to break the material. It would have been great to have more explainations about this part, but everything else was really comprehensible.

Monitor where you can search for different types of sickness and find symptomes associated

After my researches through the monitor I thought I had the good diagnostic, but couldn’t be really sure since I didn’t have the feedback from the blood sample analysis. The last step was to use those screen to note everyinformation. I remember that everything was in German so it was quite complicated to note every information. I think I would definitely have less problem if some english information where written.

Hands-on pratice example : what is green energy ?

After exploring the Experimentarium space, I went throught the sustainability room. Here is an other ambiance, with a lot of information on the wall. The graphics were really great but I think it was a bit too much to understand quickly the goal of each device. We could’nt really tell the difference between usefull explainations for the experiences and just basic information and drawing about the topic.

When entering this room, you have to collect a connected lamp, which allows you to access to the experiments. I liked the idea because it showed the physical aspect behind energy.

One of the wall you can see entering the room. As you can see there are many informations

I tried to get through this activity and really had problems. Every information was written in German again, and the main information about the experiment was hidden under this round block, which was not really logical. An other thing that really confused me was that what seems like an ipad, was non interactiv. I finally understood that the goal of the experiment was to put the phones you can see here on the tablet, which is not what you are expected to do when seeing a tablet. So it reminded me that in order for an experiment to work, you always have to consider the affordance of the device you are using, and here the tablet was non appropriate for me. I would have understood if it was something like the lamp example we showed before. An other thing, was this old phone that I found quite unpractical because it needed my left hand. I would have prefered a headphone as it was used for the other experiments.

Experiment to compare phones and their energy consuption

Underneath you can see a bicycle experiment, which I understood as a sensibilisation to consider more about cyclists and showing it as a good way to save energy.

Picture of the activity from the website

At the end of the room, you can have an otherview of all your results through the key you used for all activites. I liked the idea and sensibilisation behind it.

Summary/tracking of all your datas collected on the different experiments through the sustainability room

Hands on approach : what is a car anyway ?

In the Cosa technology space, you can develop your own vehicle and get to know the technical components. I find it was really explaining the process behind the construction of the car : through the design that we can see on this print on the wall, to the engineering part with the material construction.

Dark box : escape pause through the space and sea

To finish my journey in the museum, I went trough the dark space big media installation. I was really impressed by the setup and really appreciated the experience. It allowed me to relax and change environment. I think this part is more entertaining than teaching, I can’t say I really rememberd the content about the story, but it was still appreciating.

Dark room

Conclusion about the Cosa :

I was really impressed by the COSA center and would definitely like to go back to it with more time, and with all the facilities opened. The strenght of this museum for me, are the hands-on approaches and vision of a few professions related to science with the medical experiment and the car building. I could find a lot of similitudes between this museum and the previous example about the exploratorium because it axed on the hands on approach, there was an explainer and the center also proposes diverses activies and shows. The negative points were for me the accessibility to non german speaking people, the lisibility of information, and a few some affordance problems : there was a lot of information in each room and the hierarchy between the titles and content were not really visible. An other thing for me was the experience during the corona situation. I felt a bit unsecure doing the experiments since there was many hands on approaches, and I really question myself about the close future of science centers if this pandemie continues on a long term level.

Through this visit I really understood the social aspect behind science center. I think I may be part of those people which learn through interaction of social person and by mimicking things. Since I experienced problems without any guide (which was due to the corona situation), I really think it is something to take in account when designing an exhibition, in particular in science center. It reminds me of the questions about learning I mentioned at the begining of this subject about : what are the different types of learning, and how to imply every type in an exhibition ?

To finish, an other point to take into consideration is the affordance, continuity and conceptual models we have with the devices. It reminded me those principles from the Don Norman book , the design of everyday things that I read for my research on the portemonnaie project.

Sources :

https://www.museum-joanneum.at/en/cosa-graz

Don norman, the design of everyday things