Do you catch yourself recognising whose track/song you are listening to when you’re just shuffling randomly through Spotify, even before you look at the artist name? This is because successful music producers have a way to make sure you can instantly recognise them. This is quite beneficial, because it imprints into the listener’s mind and makes them more likely to recognise and share the artist’s future releases with their network.
So how do musicians/music producers do this? There are some key points that can easily help you understand this occurence better.
1) There’s no shortcut!
You know the 10.000 hour rule? Or as some have put it in the musical context- 1,000 songs? There’s really no way around it! This aplies to any skill in life, not just music. However, usually the end consumer never really knows how many songs an artist actually never releases. Those are all practice songs. For every release that you see out there there might be 100s of other unreleased songs done prior to it. if the musician just keeps creating instead of getting hung up on one song, they will eventually grow into their own unique way of structuring, as well as editing songs.
2) They use unique elements
So many producers/musicians use samples from Splice, which leads to the listener feeling like they’ve already heard a song even if they haven’t. Songs get lost in the sea of similar musical works, but every now and then, something with a unique flavour pops up and it’s hard to forget. Musicians who make their own synth sounds, play exotic instruments or even their own dit instruments are the ones that stick around in our minds.
3) Using the same sound in multiple songs
This is the easiest and most obvious way in which musicians/producers show their own style. You might hear a similar bass, or drum pattern in mutiple songs/tracks from the same musician. In rap/hiphop, you will also hear producer tags (e.g. “Dj Khaled” being said in the beginning of each track).
4) Great Musicians/Producers don’t stick to one style/trend
Music has existed for so long and progressed so fast lately, that it is hard to stand out, especially if you stick to genres strictly. Nowadays, great musicians will come up with their own subgenres or mix in few different ones into a musical piece. You won’t ever really remember the musicians or the producers who are just following in the footsteps of the greats who have already established a certain genre. If you can’t quite put your finger on why you like someone’s music so much and why they sound “different”, they are probably experimenting with a combination of different genres.
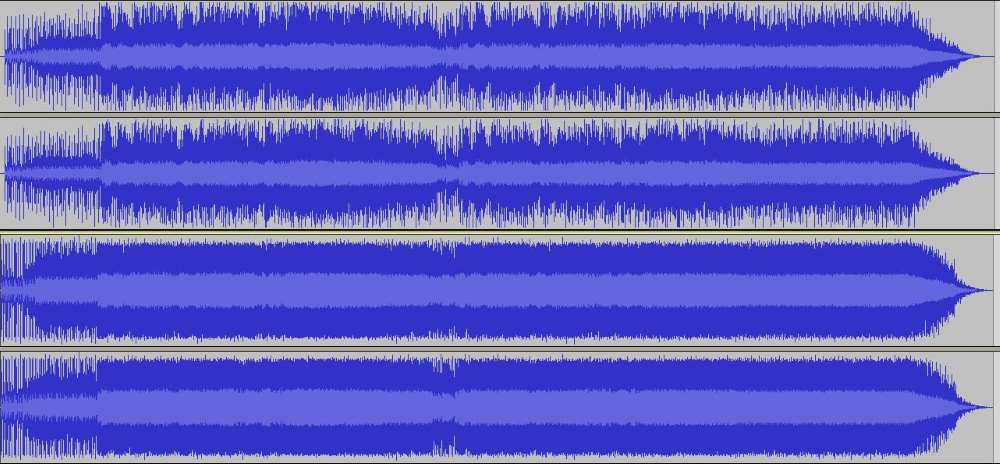
Before starting, look at the top image. These 2 sets of sound files, mastered/limited at different levels. The first one is from the 90s and the second one is what is being done post 2010. Just by looking at the graphic representations, you can tell that the first song has a lot of breathing space and room for expression, while the second one looks a bit like the life has been squeezed out of it. This is the loudness war in a nutshell- people competing to squeeze in as much volume as possible within the range that we can digitally produce.
So why is the loudness war happening? Usually, we perceive louder as better, even if a song might not be better mixed. Basically, music is getting progressively louder as time passes, thus becoming less dynamic and lively.
What are the basics of loudness? There are a few units used in measurement- LUFS (loudness units relative to scale and DBTP (decibels true peak). Our DAWs by default show a different unit- DBFS (decibels relative to full scale), which is does not show us the overall average loudness, just the momentary peaks. LUFS are actually closer to how our ear perceives loudness. It is similar to RMS (root mean square) but still closer to our own loudness perception. When mastering audio/music, it is highly recommended to get a measurement tool that includes at least these measures (but ideally give you access to more insights into your track’s dynamics, spectrum and similar):
Short-Term LUFS – Short-term peak at the current listening point
Integrated LUFS – overall loudness of the whole track
Dynamic Range – the difference between the quietest and the loudest part of the track
Momentary Max LUFS – the highest peak measured in LUFS within the audio/music that is being analysed
True Peak – The maximum peak level of the audio measured real-time, measured in DBTP. Different from the regular peak (which relates to individual tracks inside the mix)
Loudness range LUFS- measures the perceived loudness of audio material. Similarly to dynamic range, it tracks the difference in loudness between different parts of the audio
It is a big challenge to determine which loudness you should use, taking into consideration loudness perception, as well as different loudness standards presents on each streaming/music platform. Platforms apply loudness normalisation, which sets every audio file to the same integrated loudness. From my own experience, one loudness setting will never be perfect for every use case, but the most important thing is to find a compromise and choose a loudness/true peak level that sound solid on every service. Sometimes, the audio will be turned up, and sometimes turned down by certain services, depending on their own normalisation standards. Each platform will normalize the audio according to their own standards, so it is just important to make sure your source material dynamic range is good enough to not get completely squished by a music platform. The good news is that each platform recommends a dynamic range that is 9 DR or less (meaning 9 dbs difference between the loudest and quietest part).
Here are some of the standards used by the most popular platforms:
Spotify – -14 LUFS/ -1 DBTP (-11/-2 is also fine)
Deezer – -14 to -16 LUFS /-1 DBTP
Beatport – -6 to -9 LUFS /-1 DBTP
Apple Music – -16 LUFD/-1 DBTP
Bandcamp – No loudness normalisation, but -2DBTP is recommended for the peaks due to low playback quality they offer
Everybody thinks online marketing is an easy job due to all the social media that are available to us. Just share your releases on Facebook and Instagram, they say. But there is actually so much more work behind a successful promotional campaign, especially if the budget is tight/non-existent. This article will discuss all the possible ways of free promotion, including the timeframe for one campaign. Before starting this process, it is essential to have a digital distributor (for self-releasing).
The first 2-4 weeks of a release promo campaign are what comes before actually releasing anything. The artist should upload their work through their distribution service as a pre-release and set a later release date. This time during the pre-release will be used to garner Spotify saves that are beneficial for the algorithm, as well as pitching your work. It will be important to find promoters, playlists and curators who are willing to include your release on their channels in order to gain you a bigger following post-release. The reason why we leave so much leeway before the release date is because it takes promoters time to come across your submission. Sometimes it can take even 6 weeks. My favourite submission networks for this are LabelRadal and SubmitHub. The first platform gives you access to both labels (if you have unreleased music to pitch) and promoters with YouTube channels, who will share your work if they like it. On SubmitHub, you will find different types of curators- Youtubers, instagram influencers, and Spotify Playlists. Both of these networks allow you to pitch to a certain extent for free, but better features come with a subscription. However, most of the time, I could get away with sticking to the free version, especially on SubmitHub.
The next step is to figure out your social media campaigns. Have a total of 3 announcements- the day of pre-release, one day before the official release, and then finally the day of release. This way you will build up hype and interest. Also, make sure you are always active on your social media and have quality content that grows your following, as well as keeping your engagement up. If your social media is a bit dead, you won’t generate many streams from promotional posts.
Now it’s time to think about Spotify specifically. I focus on this platform because it has shown the most results for my efforts. After the official release date, you will have to search out playlist curators and build real connections with them. This way, you will have someone to come back to time and time again for each next release. Make sure to offer some sort of value proposition to curators, not just blindly begging them to playlist your tracks. Start with smaller playlists and build your way up as your streams grow.
The next thing in mind is to always keep up with how streaming platform algorithms are changing. For example, Spotify recently announced that they will be pushing out artists who agree to forgo some of their streaming profits in return for promotion. This could actually make the popular artists even more popular and the smaller ones will stay small, because they cannot afford to cut their already small profit.
TikTok has become a really important gateway to potential fans. Adding your tracks to their library opens up the possibility of your track going viral. For example, tiktokers tend to come up with trends that are copied by many other users on the platform. Often, these trends include a specific track or song. It is important to make sure that music you are submitting to TikTok is either “memeable” or that is has a potential for popular appeal.
Lastly, if all of this seems too complicated or like a lot of work, I would suggest one more step that is paid. This step may help you get much further, as it takes away the promo burden off of you and let’s you focus on music production instead. Get yourself a virtual music manager. One great example is https://www.thevirtualmanager.co.uk/ which have a monthly fee of 24 GPB, or 240 for a yearly plan (2 free months + a free 1-on-1). Personally, I consider this the next step after self-promotion, which will open many more doors for your music.
For all of the steps to work, be realistic to yourself and objectively determine whether your music is of high quality or not. Quality comes before anything else.
Or in other words: How to correctly pitch your songs to professionals
Due to a recent achievement, which is having my newest song being played on radio FM4 multiple times and giving an interview on it, i thought I’d share my knowledge.
Tools that help pitching
Before talking about pitching to FM4 or in general to radio stations, I’d like to show you two of the most known alternative options, which require far less work.
SubmitHub
This site lets you submit to bloggers, labels, YouTubers, playlisters, influencers and radio stations (small ones though). When creating your account you get a few credits which then can be spent on different people and networks – usually the bigger ones cost a little more. This site might look overwhelming at first but has a lot of great features! Unfortunately, you can’t really send your music to many outlets without purchasing some premium credits. The average approval rate on standard credits is 4%, as opposed to 18% on premium. So, the free credits don’t do as well but still, they do something. And if you only want to target a specific YouTube channel for example this would be perfectly sufficient.
LabelRadar
In contrary to SubmitHub, LabelRadar is far more minimalistic and easy-to-use. Now, don’t get fooled by the name – of course you can send your music to labels, but to promoters as well! Like the previous one, this website gives you a few credits when you start out, but you can send you music into a general pool where the labels or promoters don’t get notified but can browse through. And if you spend all of your credits, they will send you 5 new ones once a month.
Pitching to big radio stations
Okay, so get your pen and paper ready – you’ll want to follow this as closely as possible. I have heard of cases where radio stations did not listen to a track simply because it was in a zip file. This is understandable considering they have to listen to huge amounts of tracks every day. So, as artists it is our job to make it as easy as possible for them to listen to our songs. And we can do that with email and a link to a Dropbox folder. More on that later. Below is a list of what you need but I will get into detail anyway.
the song (obviously)
artwork
either a classic Press Kit
or an EPK
professional press photos
The song
Obviously your song has to fit in the radio station’s program. Ideally you have heard something similar in the past few weeks, which is something you can then refer to in your email. In your Dropbox folder add the file as an mp3 and as a wav (one for listening and one for actually airing it). Be sure to add as many id3 tags as possible. This can be done with software like AudioShell. As wav files don’t really support much tagging I always provide a flac file as well so that the tags appear as well as it being a lossless file. If your mp3 is smaller than 10MB (with id3 tags) then you can add it as an attachment to your email.
Artwork
The most important Artwork is your cover – including this is a must. Any other stuff you have might work as well. Don’t add your “coming soon” banners, but if you have a Spotify Canvas or something then they might look at it and maybe even share it.
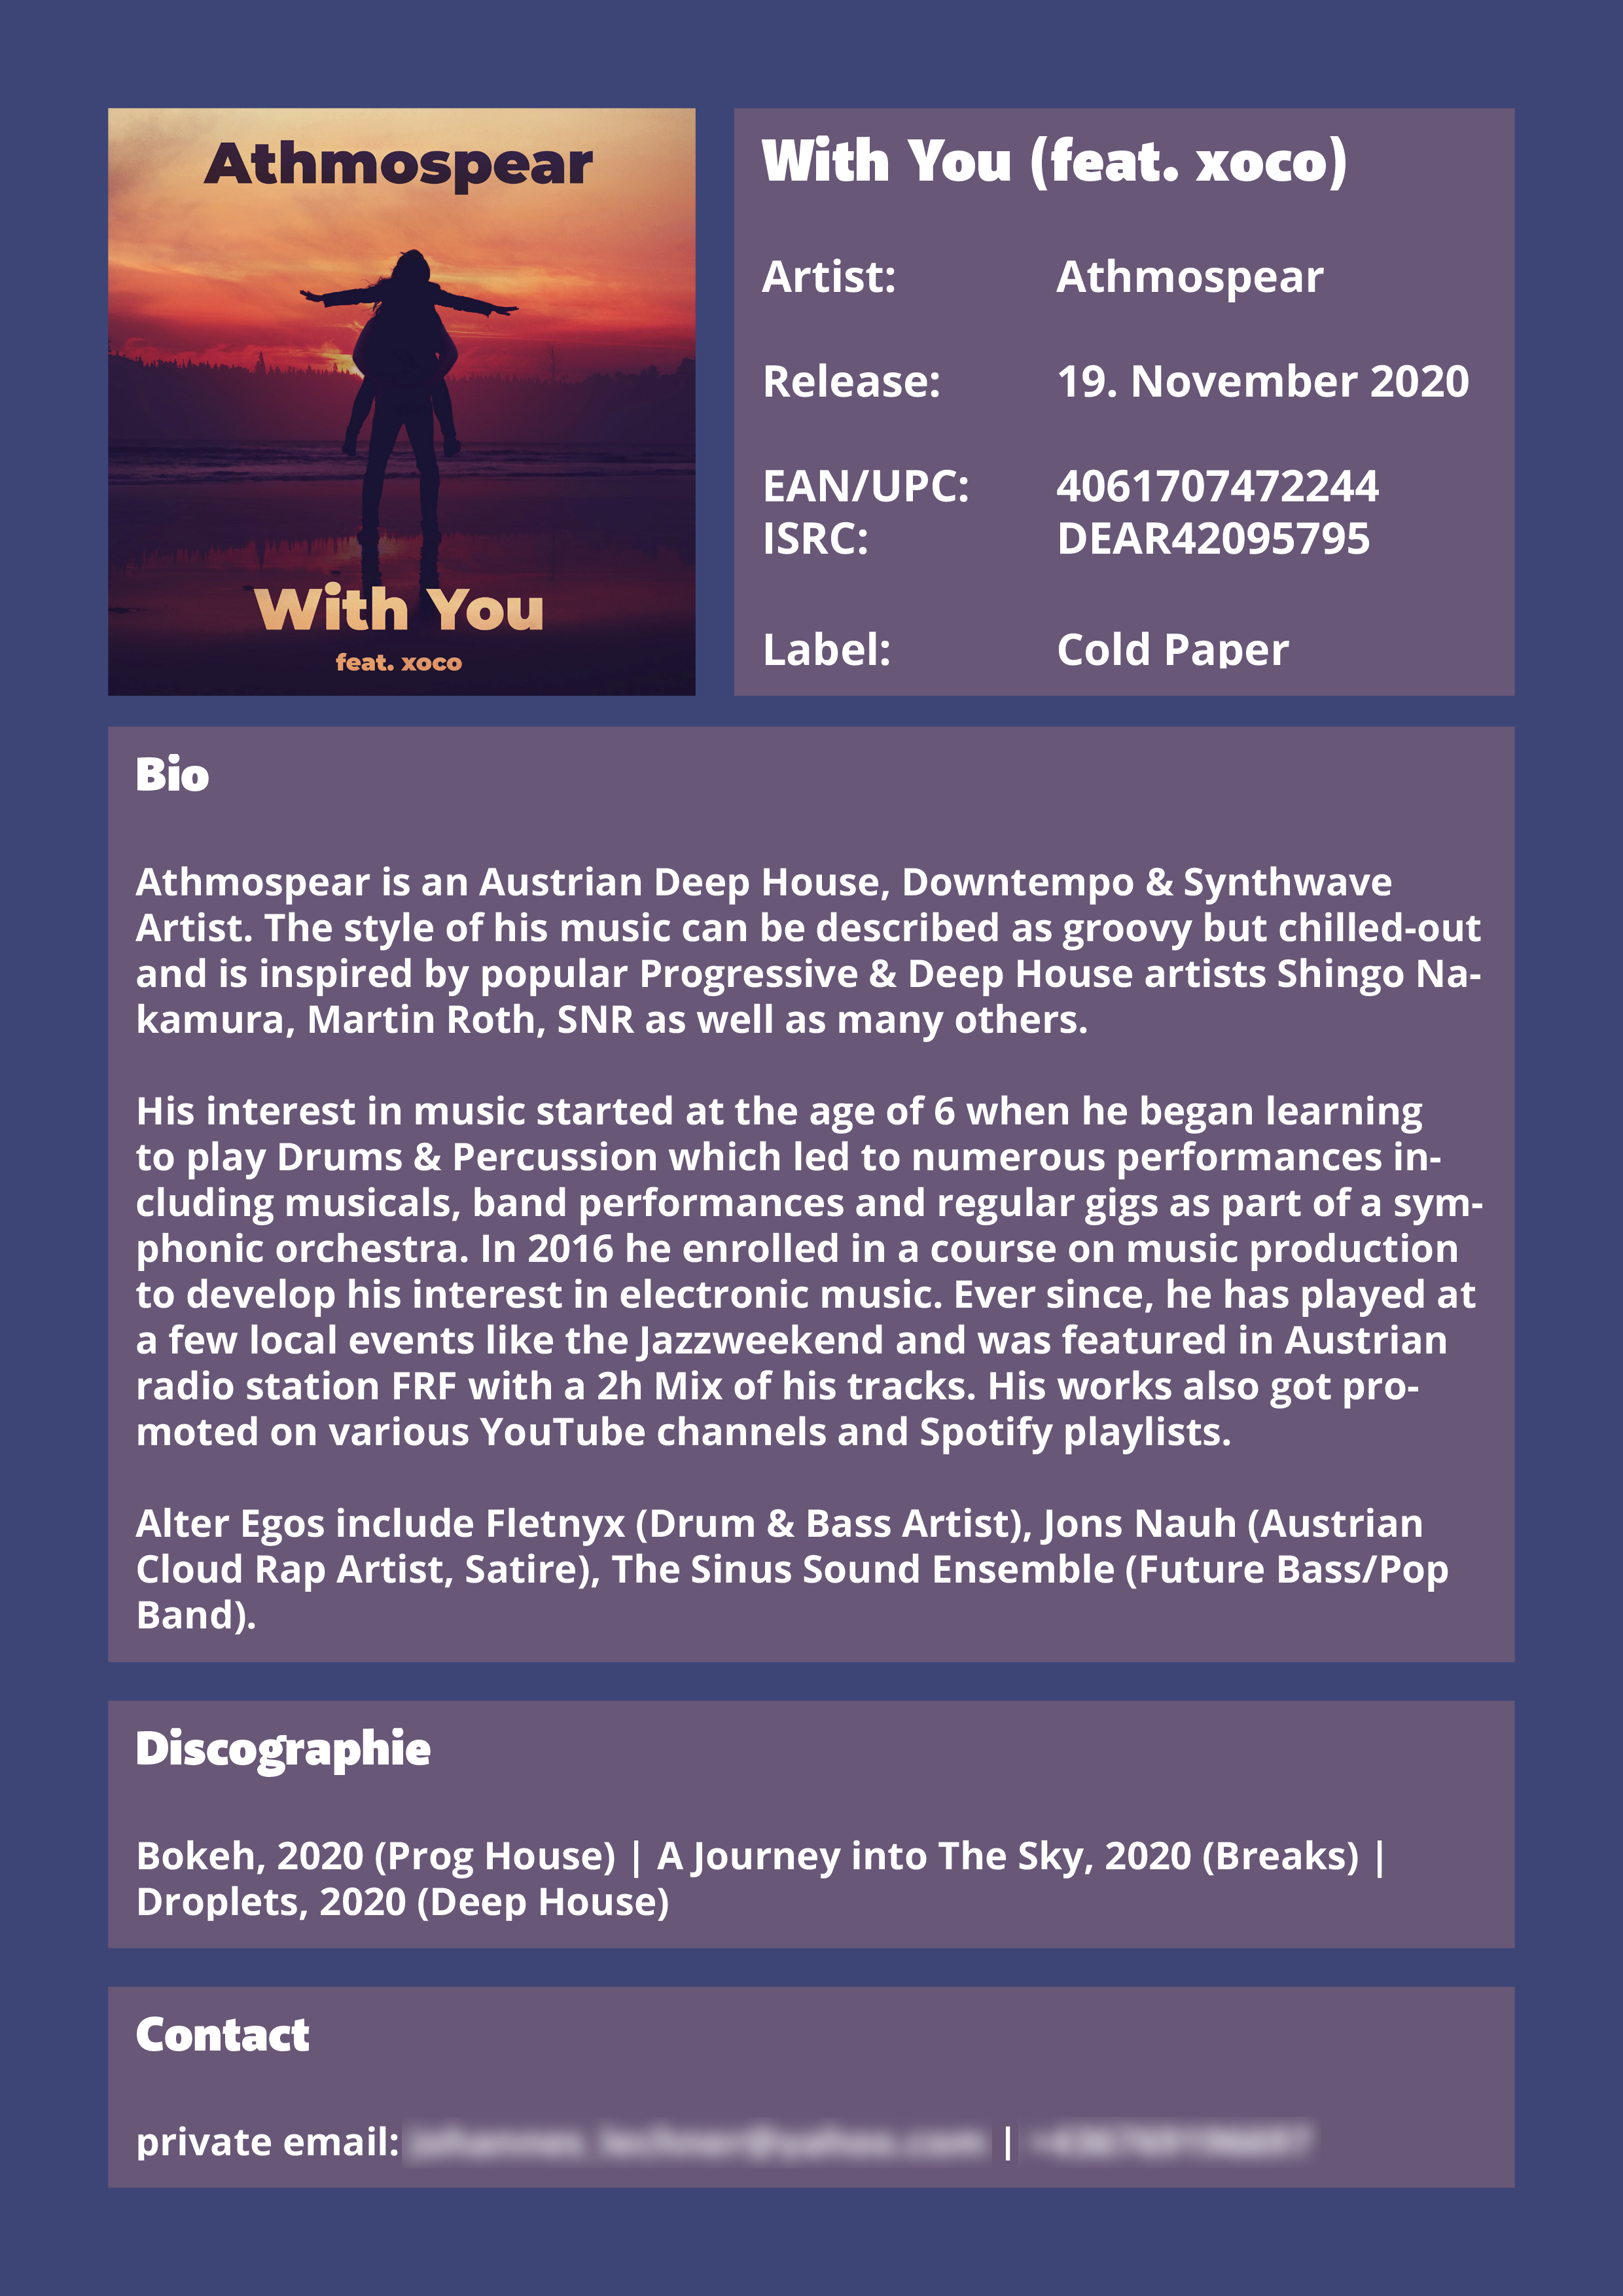
Classic press kit
This is a one page A4 document containing all the information for your release. At the beginning of the press kit you’ll want to show all the basic info like your release title, cover, artist name, release date, label name, IRSC and UPC/EAN. Then add a short biography and a list of previous releases. Finally add some contact info. In my case including my phone number resulted in a spontaneous call where we did an interview.
Here is an example showing the press kit for my latest release “With You”:
Press Kit for “With You” – right click -> view image to make it bigger
And one more thing: don’t shift the design around too much. The radio stations will want to open a press kit and just look at a certain point rather than searching for the info!
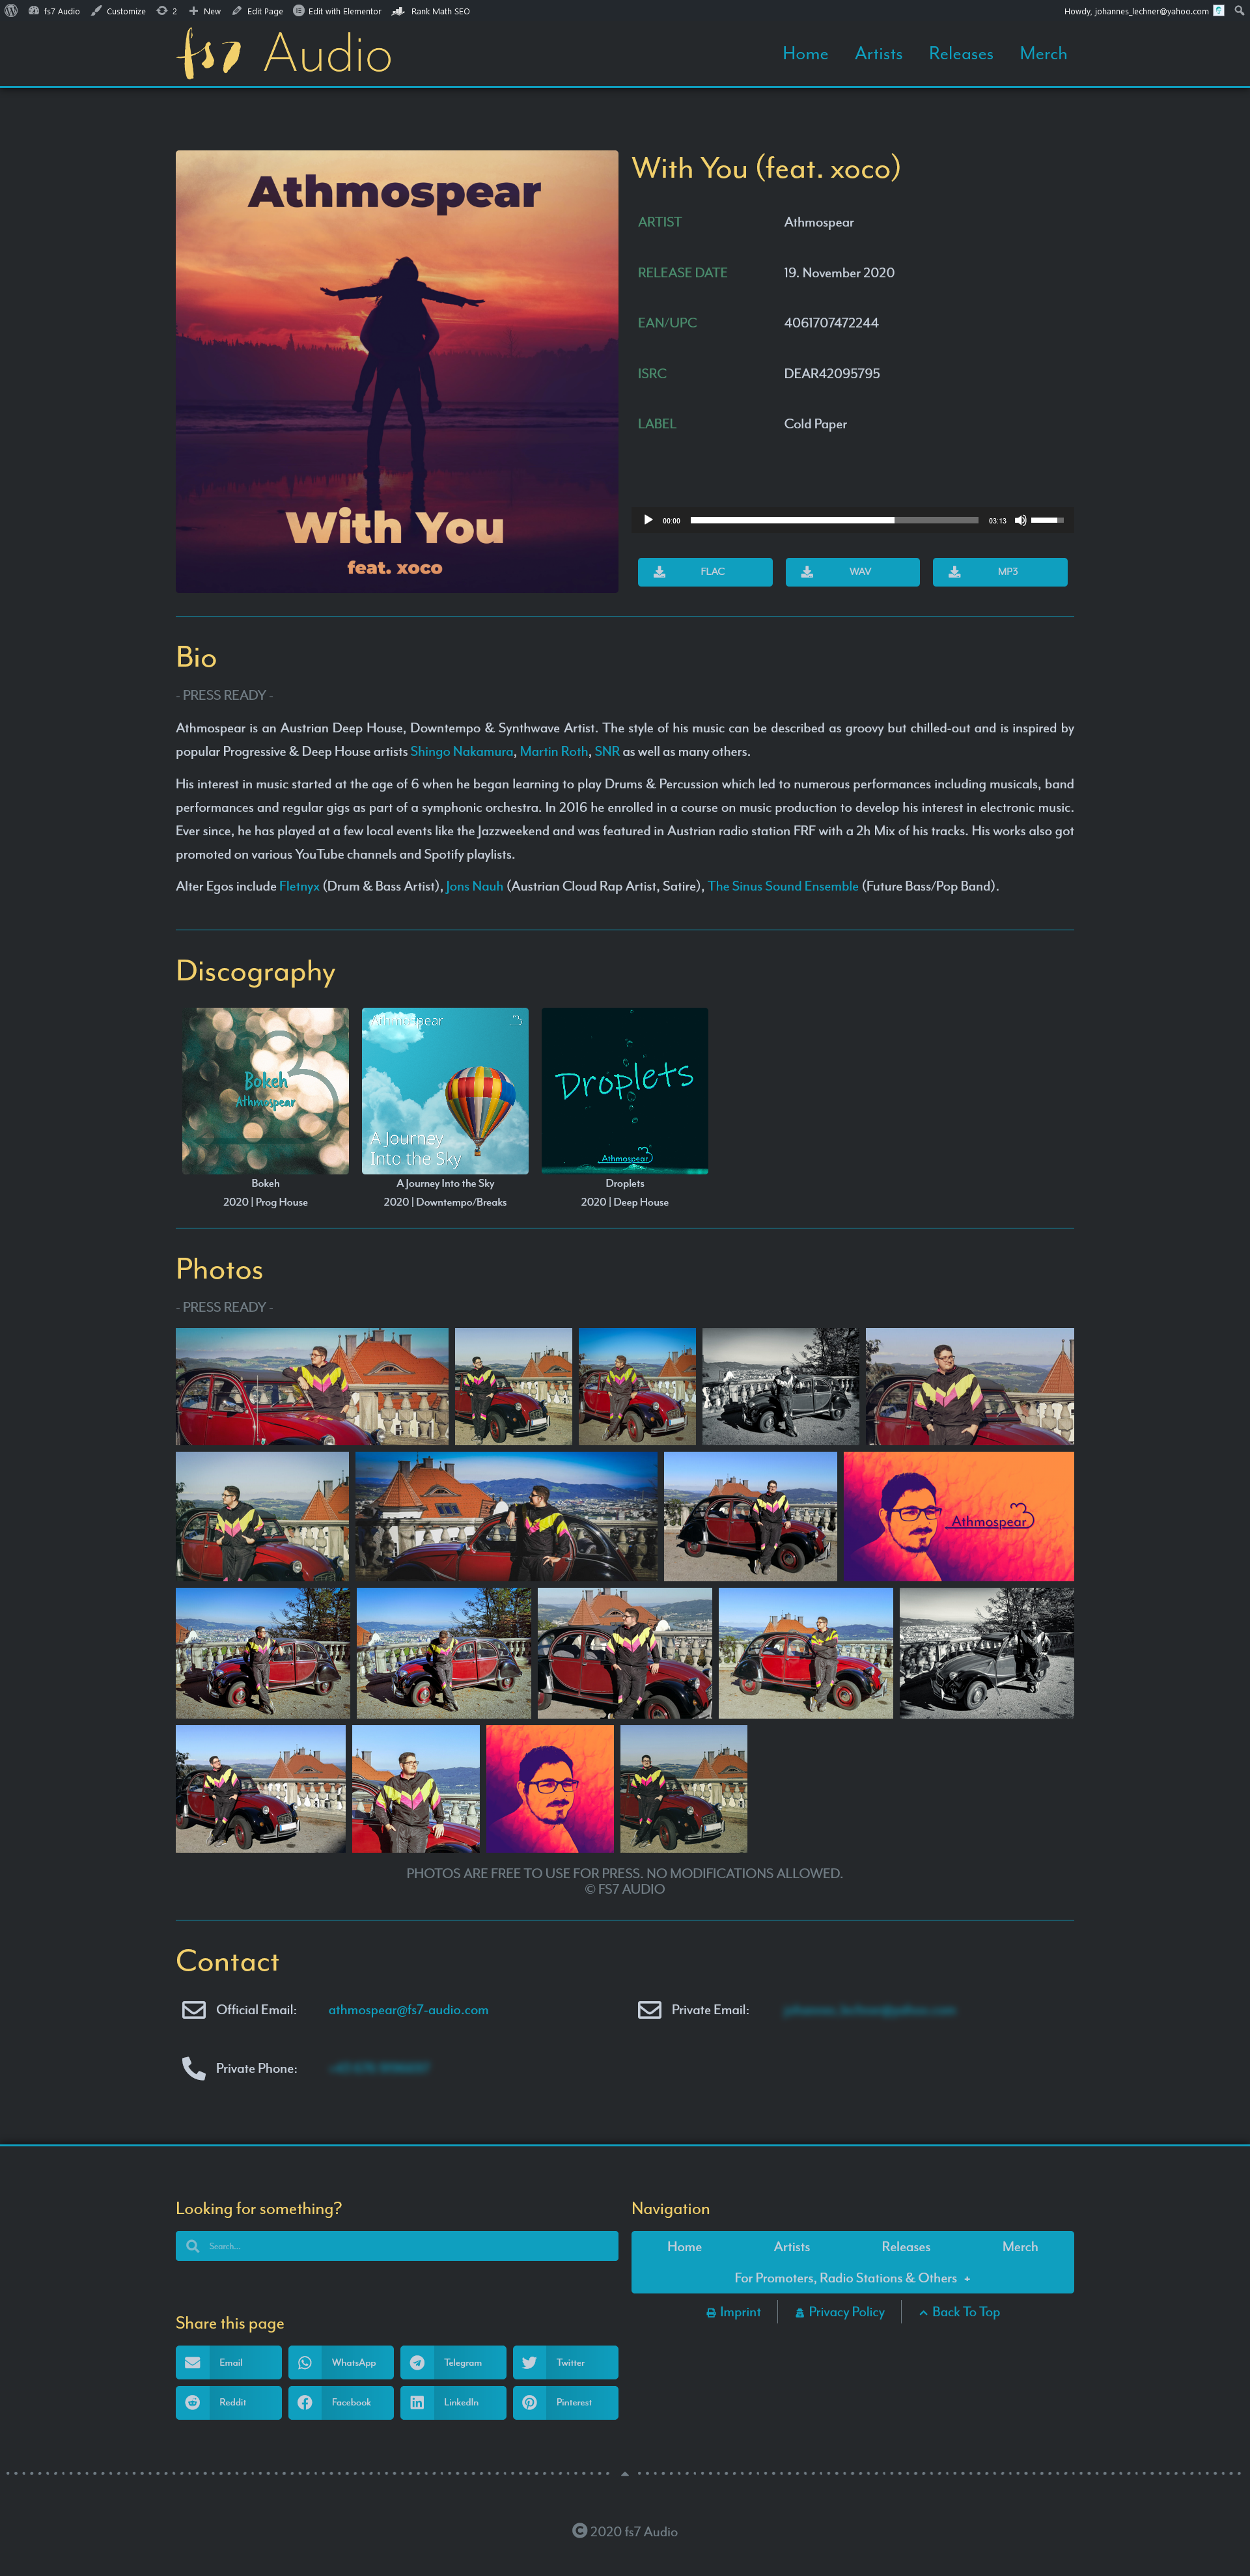
EPK
EPK stands for electronic press kit. If you have a classic press kit you won’t need an EPK but I usually to do both. Essentially the EPK is the same as a classic press kit, but it being online comes with a few advantages: You can embed your music and let it autoplay when opening the webpage. Your songs can directly be downloaded with a button. And you can make fancy galleries with your press photos!
Here is an example, again for “With You”:
Screenshot of my EPK for “With You”right click -> view image to make it bigger
Whether you want to offer the complete song as a download or not is up to you. If you are concerned about other people finding this page and downloading your music I have a suggestion for you: Either you use a file sharing service and just don’t offer it on your site. Or you do the more elegant way and use some PHP coding / WordPress plugin installing. I’m using Members to create a custom group for press, promoters, etc. Then I’ll set up a temporary login link for that user group. Finally, to hide the page from normal users, I’m using Visibility Logic for Elementor (and Elementor Page Builder obviously).
Press photos
There’s not much to talk about this one but be sure to have them somewhere ready to be viewed and downloaded!
The email
Now that you have all the parts prepared let’s talk about the email. The most important thing to remember is the KISS Principle (Keep It Short and Simple)! Describe your song in about one to two sentences and then add the link(s). Then thank them for listening and that’s it! As mentioned above, if your mp3 (including id3 tags like the artwork) is smaller than 10MB you can add it as an attachment.
Now about the links: If you have an EPK you should add the link to it here. The other link will be to your folder on Dropbox or other providers and this should contain the audio files, the cover, the press kit and if applicable a txt with the lyrics. I also like to include a shortcut to my EPK but this is probably not very useful as the link is already in the email.
And that’s it. If you have done everything correctly send you music about 1.5 to 2.5 weeks before the release date. And then you’ll have to play the waiting game – with a bit of luck you’ll have your music on FM4 (or any other radio station). Let me know in the comments if this was helpful to you and whether you plan to send something to a radio station or if you already had something played on air!
You have just released your new Single, are super proud of it and now want to share it with the whole world. So how do you do that? Posting 20 different links for Spotify & co isn’t really an option. Especially when Instagram only allows you to post one link in your Bio. Creating your own website which providers all the links wouldn’t be that much work. If you know some HTML and CSS you could have a basic layout very fast. And using libraries like W3.CSS or a CMS like WordPress gets you there even faster.
That would actually be a good way to go if you didn’t have to do the whole process of looking up your release on every major platform, copying the link and pasting it into your website. Now repeat this for every release. But of course there are stores like Pandora, which are not available in your country, which means you’d need to set up a VPN to get a link from there.
There is a better way to do this: smart links!
What are smart links?
Smart links are a tool that takes all the work described above away! They provide you with one link and show all the shops you’d want to list. And the best part: They collect the links automatically, so you just enter your info once!
Here’s the catch: The most popular services, have fees like linkfire‘s monthly $10. And with those 10$ you can’t add your own stores. Your distributor might offer a similar service. These are most of the time included in your plan. Below are two examples using my own songs.
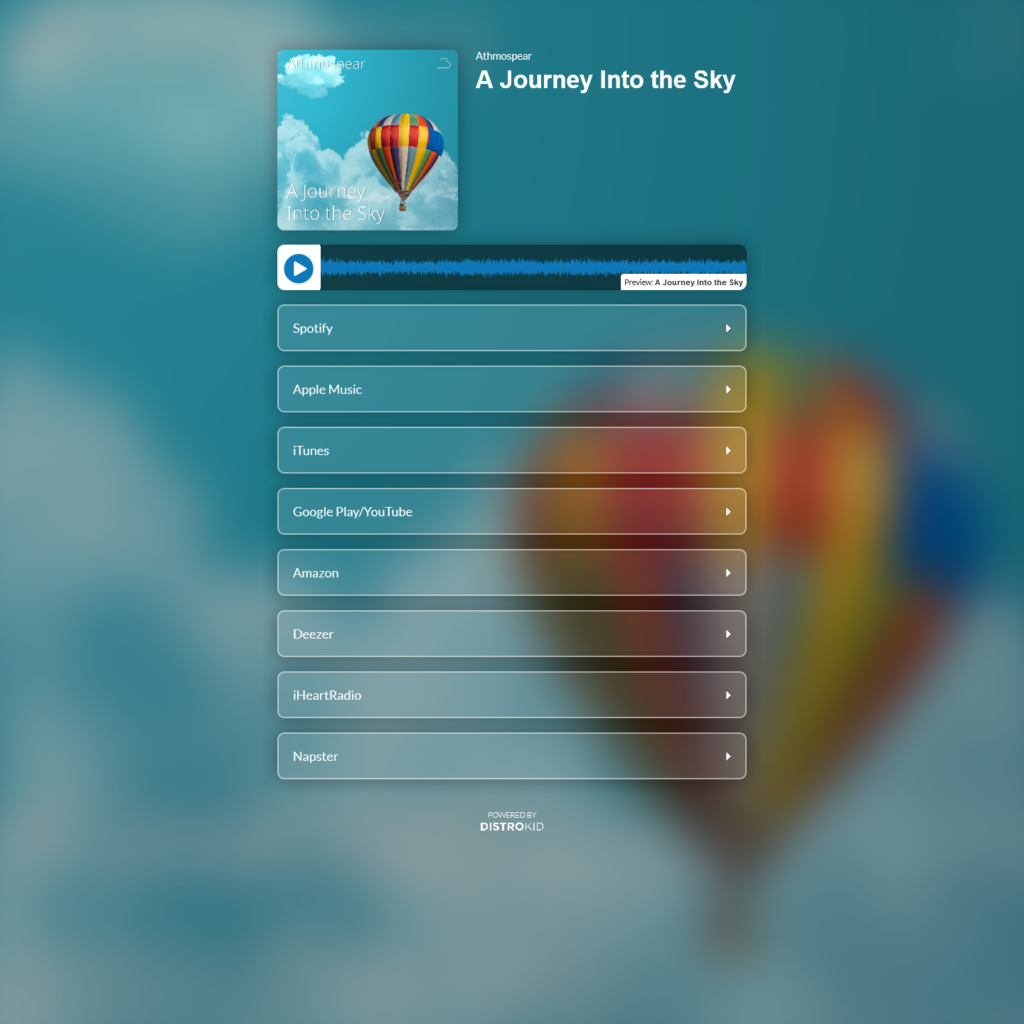
“Hyperfollow” – The smart link system by DistroKid
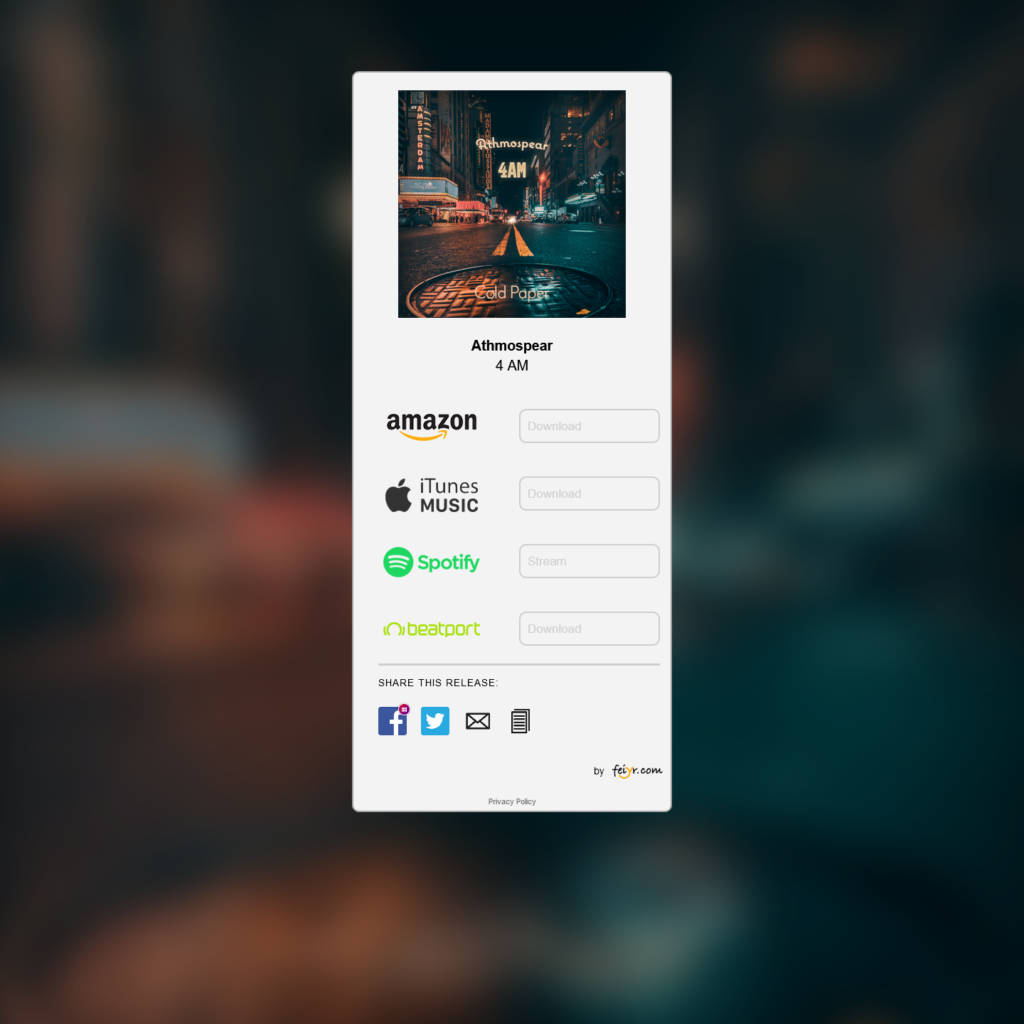
“Link-it!” – The smart link system by Feiyr
Smart link systems by different distributors
The big problem with both, paid and free services, is the branding. At least the URL will always reveal that this is some third party product.
And now that you know what’s out there we can talk about my approach!
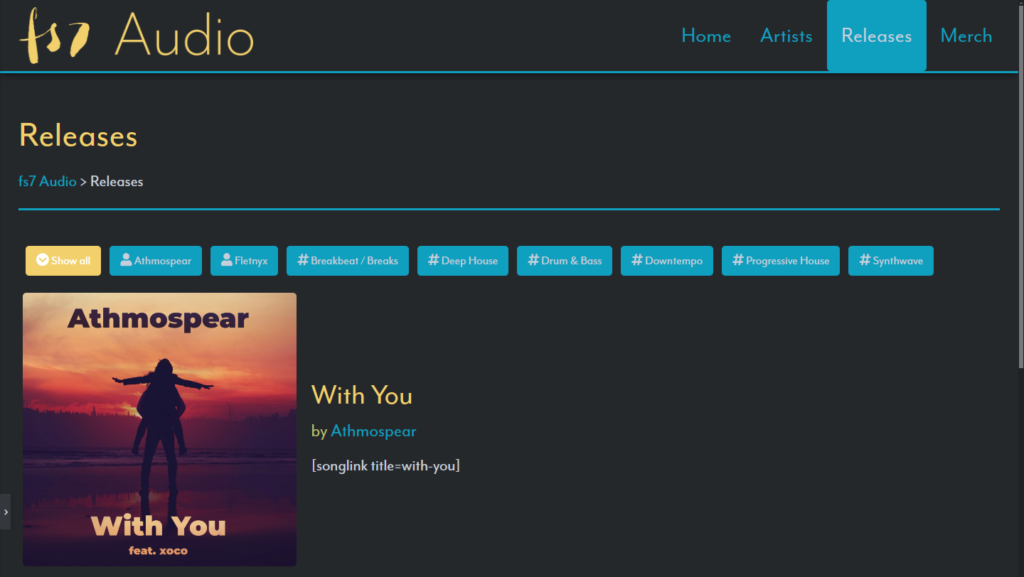
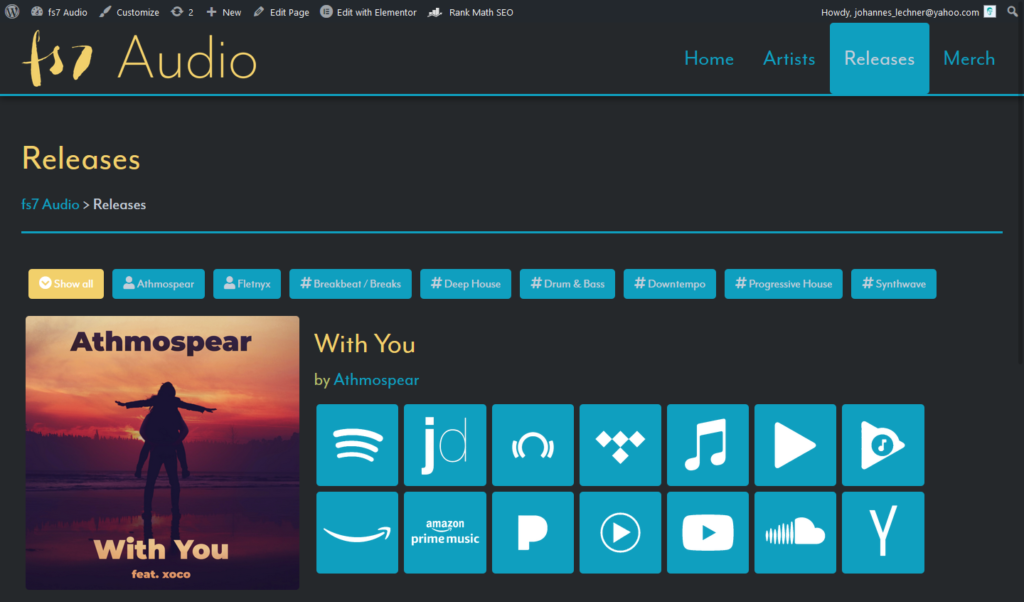
Smart links without branding: the Black Paper Songlink Plugin for WordPress
First let’s talk about the name: Black Paper was one of my labels at the time of creation and I actually initially developed this plugin solely for it’s website. Black Paper has since been replaced by fs7 Audio. Songlink was a free smart links service, which since got a rebranding. It works the same but is now called odesli (On Demand Smart Links).
Okay. So how does it work?
First of all: Here is the GitHub page where you can download the code as a zip. Right now this is very rough – but it works! So I currently do not have any plans to further develop this. The way it works is that it accesses the odesli API once and saves all links into a json file. You can then access this json from anywhere on your site with a shortcode and it displays all links. Here are two images showing the magic:
When EditingHow it’s Rendered
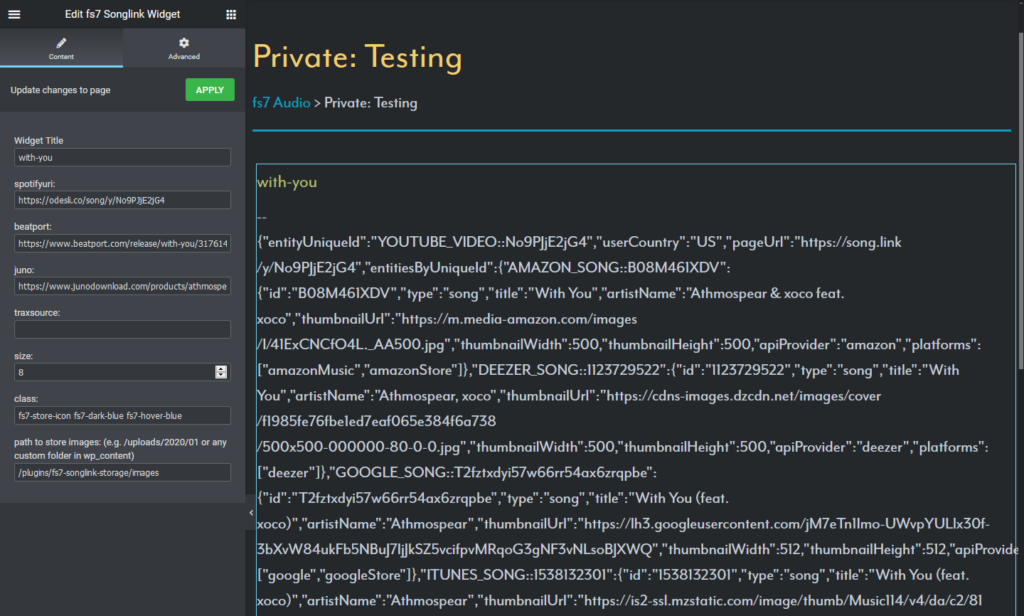
Let’s look at how to create such a json
When you have uploaded all the files and activated the plugin, create a new private page. It’s important that this is private because it just serves to create the json files and nothing more. You probably do not want your vistitors to see this. Add the BP Songlink Widget to your site and you can start filling your details in. The “Widget Title” field will be the name which is later called by the shortcode. And in the “spotifyuri” you can paste your songs link from any platform – not just Spotify!
This is how your Widget should look like when filled out!
The fileds “beatport”, “juno” and “traxsource” have to be filled manually as these links do not get collected by odesli. And in the “class” field you can add any CSS classes you have defined in your child theme’s stylesheet. This is where you can get creative and customize everything to perfectly fit into your website!
And now you are done! Head over to wherever you want your links to be displayed and just add a [songlink title=your-title] shortcode!