The semester is coming to an end and by now, all Projects should be brought to an end and result should already be visible. For my project experiment part 1, I have finished collecting data from 30 test subjects. As mentioned in a previous post, there was a training process that had to be done for my specific experiment. The subjects all watched a training video for 20 days. Before the first video and the last one, they were asked to do a synesthesia test on Synesthesia.com . Afterwards, I sent one of my 4 tracks to each of the participants. I made sure to have approximately the same amount of answers for each track. So far I have not interpreted all data, but based on the synesthesia test, I am getting mixed results, from a very slight improvement, to a significant improvement. After analysing the answers to the questionnaires, I will see how much that change in answers impacts the real world answers. I presume that the real world presentation will have slightly better results than the test itself. In this article I want to explain what I did with the video and how I presented the songs. Each song was called “Track” with number extensions from 1 to 4. The numbers were mixed that they do not correspond to the order of the songs. Here is my training video to show you how it looked like. The subjects were instructed to watch it once a day for the duration of the test in hopes that it will train their brain for better synesthetic perception.
Tag: music
The effect of an artificial sonic ambiance in office buildings
Have you ever thought about the sounds inside office spaces in different buildings? Hows does a concrete space feel in comparison to a glass and wood one? What if the sounds you heard were actually not generated by the space itself?
I’m on the 20th floor of an office building on Wall Street. One of the offices inside is equipped with about a dozen speakers, some sitting on plinths, others mounted on the ceiling. Aric Marshall, of audio software company Spatial, is leading a demonstration of a new soundscape designed for the workplace. Holding his phone, he says “Just listen,” and touches the screen. I ready myself to hear the soundscape come out through the speakers, but just the opposite happens. The sound I hadn’t processed turns off, plunging the room in a cold, uncomfortable, almost metallic silence. Without me realizing it, a soundscape had been playing all along—in this case, a muted, almost imperceptible pitter-patter of rain falling on the roof of a wooden cabin—coating the concrete office with a sort of soft, sonic balm.
Nowadays, our senses are bombarded from every side. Companies are competing for our attention any way they can, and now lots of them have started using sound as a marketing strategy. Companies like Ambercrombie and Fitch and Mastercard started using their own signature soundscapes in stores in order to stick in consumers’ minds.
The article author goes on: “This week, I experienced what an office could sound like if someone intentionally designed it that way. Here, that someone is in fact two companies: sonic-branding studio Made Music Studio and Spatial, an immersive audio-software platform. As companies continue with their quest to lure tenants back into the office, both are betting that bespoke soundscapes can provide a resounding advantage.”
Made Music studio has been experimenting with implementing different soundscapes in companies that invoke an emotional response and increase the immersion for customers. Imagine how it would be to walk into a hotel where you have “welcoming ambience,” “focusing ambience” and “energising ambience`.
Resources
Disney’s Imagineering – Sound
Disney is very well-known for the immersive experiences they are able to offer in their parks. Every little aspect has to tie in with the rest in order to form one amazing whole that is Disneyland/Disneyworld. Since I am a sound designer, I was interested in how do the Imagineers approach the problem of sound design specifically. It turns out that the parks offer a lot of unique challenges, as well as opportunities. There is a whole team of people working on the sound alone. A few music researchers look up different music online, determine the mood of each park attraction and come up with a bunch of ideas and a mood-board that is then given to the sound lead to create a piece. The pieces are made used different online music resources, as well as Disney’s own sound libraries and new sounds created specifically for the parks. In order to sonify the whole park, a lot of big and small speakers are hidden everywhere around the park. They all play at different times and volumes in order to simulate different effects. It is also very important to think about the difference between times of day within a sound composition. The style of the sound piece must perfectly match the theme of each park attraction. There are also different styles of speakers, from very directional, to ones that are more wide. There are also tons of materials with different levels of absorption around the park. The sound has to attract visitors to explore sections that appeal to them. The environment has to feel like a whole different realm. The sounds include anything from dinosaur roars, birds, fictional monsters, cicadas, wind, water, rainforest, and many, many others. As one approached to each ride, the sounds become less and less audible. Then a more robotic sound design is used to put focus on the rides themselves. As rides progress and take you into the centre of the action, all the incredible sounds come gushing back, hitting the visitors in. the face and leaving them in awe. The following video showcases all these principles and goes in depth on the topics i mentioned in this article:
Ambisonic Clubs – Just a Fad or the Future of Nightlife?
Mainstream digital media is still stuck in stereo. Most people cannot imagine how music would sound in a realm of multi-channel setups. Ambisonic music has a small, but dedicated fanbase consisting mostly of audio nerds- engineers, sound designers and music producers who are looking to innovate their craft. Right now, ambisonics are in their infancy when it comes to nightclubs and festivals. So far, there are only 2 organisations that have made strides in making the 3D club dream a reality.
Envelop San Francisco
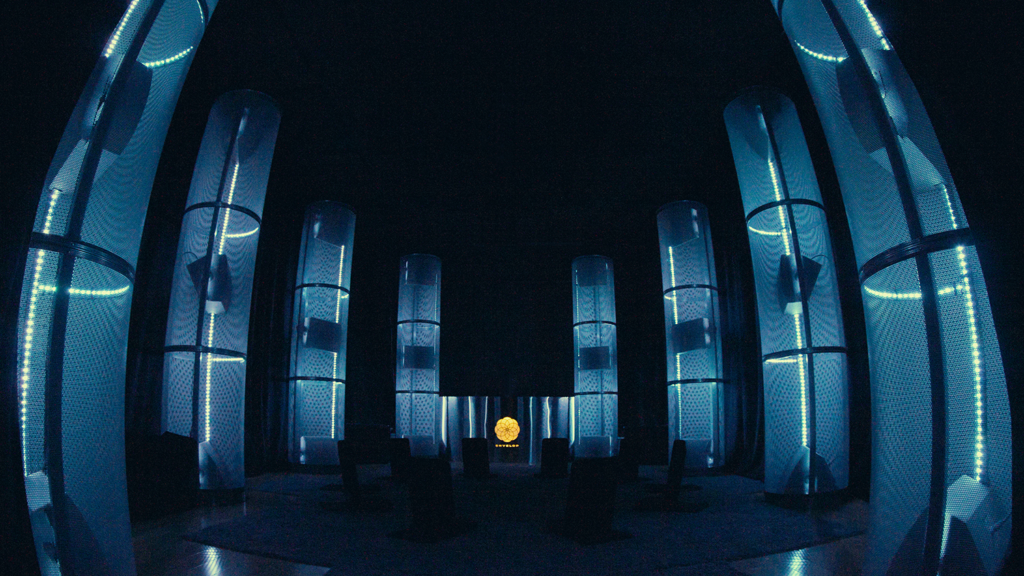
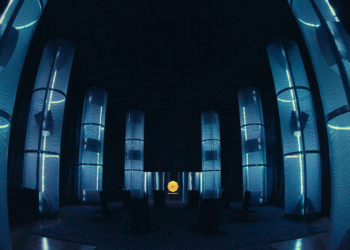
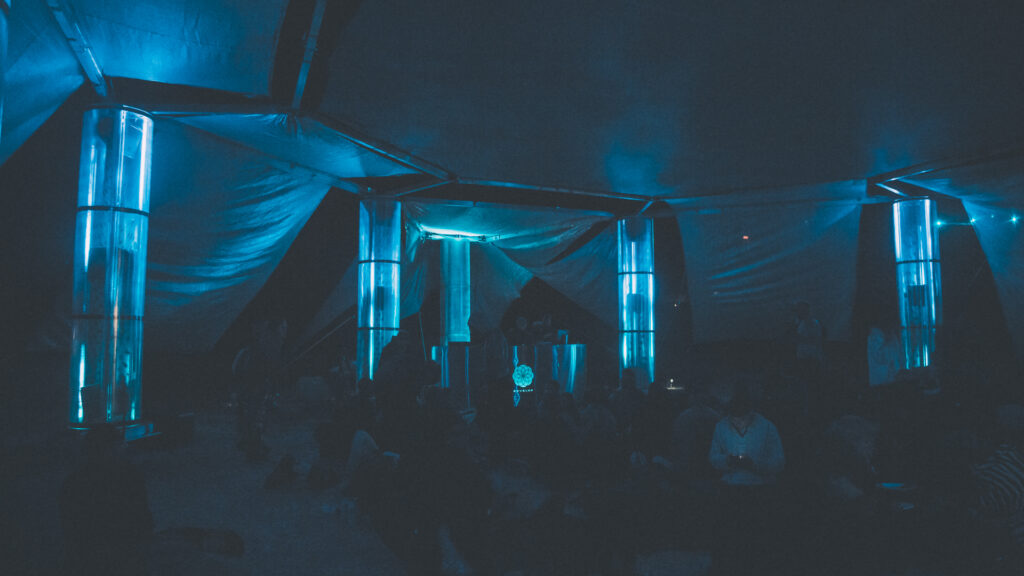
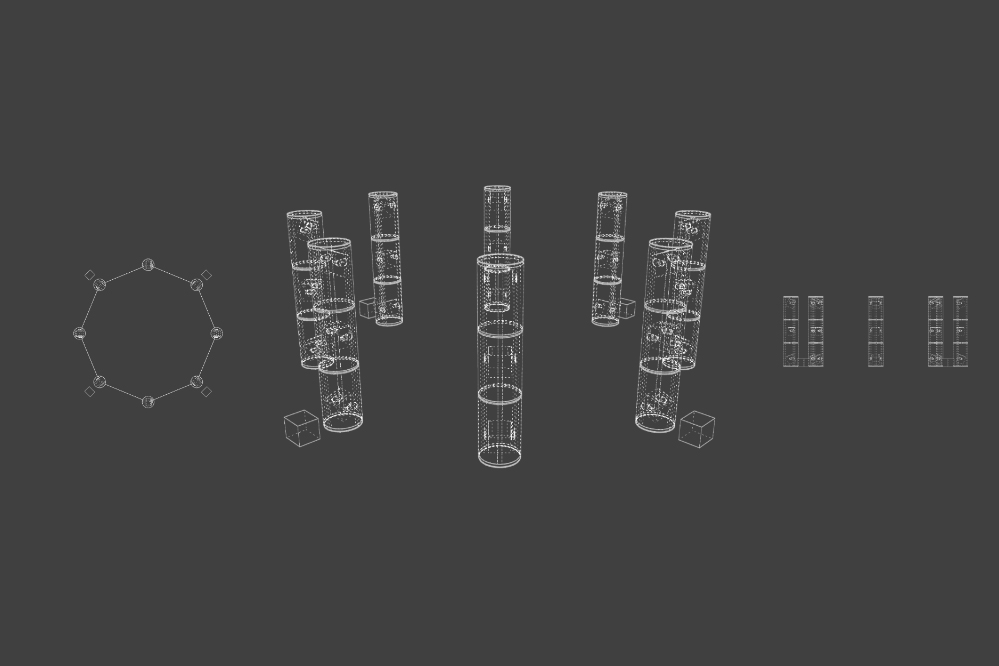
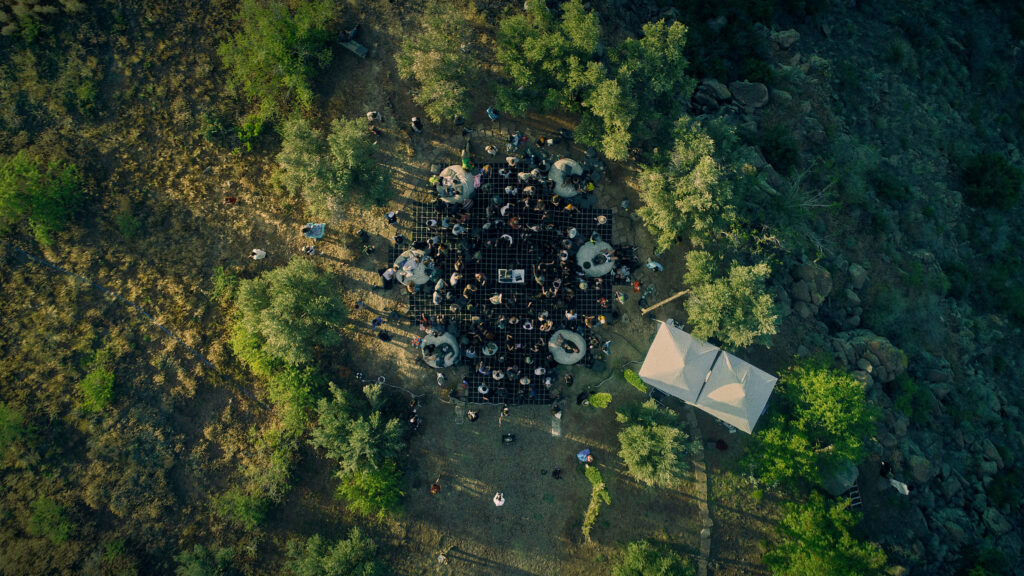
Envelop Audio is a company that funded most of their ventures through Kickstarter campaigns. They released a series of free devices for Ableton Live, which help turn the DAW into an ambisonic production suite. They set a campaign goal of only 27,000 USD to build a space that will continue to be used as a 3D nightclub and a place for other ambisonic events, like sound baths and ambisonic workshops. The good thing about this club is not only that music lovers get to experience clubbing on another level, but the experiments and innovations within the space contribute to the further development of ambisonics as a field in audio engineering. The SF-based club has 32 speakers and 4 subwoofers to play with. There is a certain setup required to run all these speakers. The DJ must use Ableton and the Envelop 4 Live devices, as well as a touch-optimised app for controlling individual elements of a multitrack composition, just like a mixer would. From there, musicians can perform and mix their music from Ableton and control how much of which sound goes to which speaker. The great thing about Envelop is that the company found a solution on how to expand their reach and introduce more people to the joys of ambisonic music. This is done through their other, more mobile events, called Envelop Satellite and Envelop Pop-Up Events. Satellite is a large mobile space that can be assembled at different locations for important events, with full immersion which includes walls and a makeshift wall. Pop-Up is a more compact version intended for use at festivals or daytime events, even indoor! The system consists of an immersive listening space defined by 8 points of immersive sound and audio-reactive lights.
Club “Audio” San Francisco
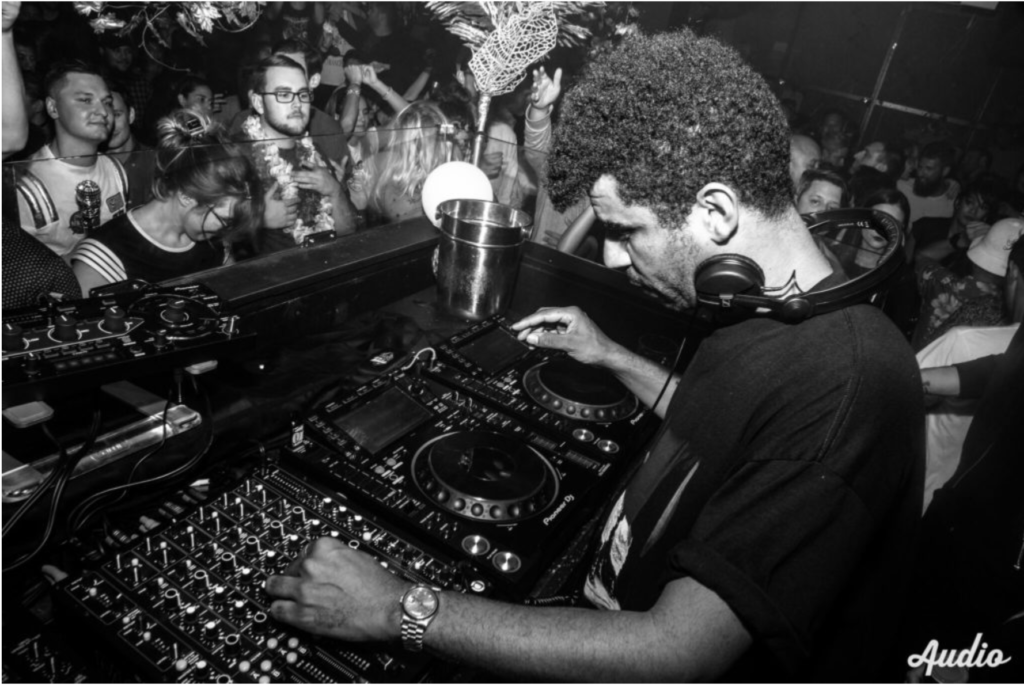
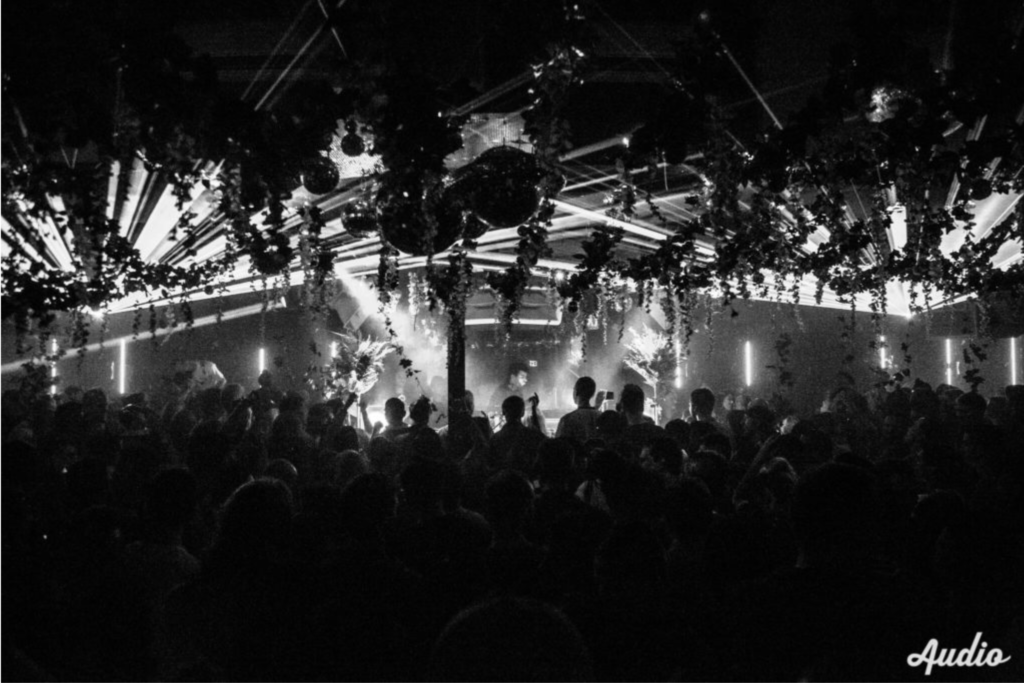
The second immersive club is oddly enough also situated in San Francisco, and is iconically called “Audio”. The debut 3D event happened in November 2017 with one of the currently most popular House DJs, Jamie Jones. The club partnered up with Funktion One (pioneers among live audio technology) to bring forth a multi-speaker setup where individual elements are separated similarly to Envelop’s setup.. On top of everything, there are fully functional rumble packs under the dancefloor to improve the immersion with bass frequencies. The venue packs 400 people and is claiemd to be a massive upgrade to the dance scene and the so called “altar for DJ Gods”.
Resources
https://techcrunch.com/2015/04/09/envelop/amp/
How Music Producers Find Their “Sound”
Do you catch yourself recognising whose track/song you are listening to when you’re just shuffling randomly through Spotify, even before you look at the artist name? This is because successful music producers have a way to make sure you can instantly recognise them. This is quite beneficial, because it imprints into the listener’s mind and makes them more likely to recognise and share the artist’s future releases with their network.
So how do musicians/music producers do this? There are some key points that can easily help you understand this occurence better.
1) There’s no shortcut!
You know the 10.000 hour rule? Or as some have put it in the musical context- 1,000 songs? There’s really no way around it! This aplies to any skill in life, not just music. However, usually the end consumer never really knows how many songs an artist actually never releases. Those are all practice songs. For every release that you see out there there might be 100s of other unreleased songs done prior to it. if the musician just keeps creating instead of getting hung up on one song, they will eventually grow into their own unique way of structuring, as well as editing songs.
2) They use unique elements
So many producers/musicians use samples from Splice, which leads to the listener feeling like they’ve already heard a song even if they haven’t. Songs get lost in the sea of similar musical works, but every now and then, something with a unique flavour pops up and it’s hard to forget. Musicians who make their own synth sounds, play exotic instruments or even their own dit instruments are the ones that stick around in our minds.
3) Using the same sound in multiple songs
This is the easiest and most obvious way in which musicians/producers show their own style. You might hear a similar bass, or drum pattern in mutiple songs/tracks from the same musician. In rap/hiphop, you will also hear producer tags (e.g. “Dj Khaled” being said in the beginning of each track).
4) Great Musicians/Producers don’t stick to one style/trend
Music has existed for so long and progressed so fast lately, that it is hard to stand out, especially if you stick to genres strictly. Nowadays, great musicians will come up with their own subgenres or mix in few different ones into a musical piece. You won’t ever really remember the musicians or the producers who are just following in the footsteps of the greats who have already established a certain genre. If you can’t quite put your finger on why you like someone’s music so much and why they sound “different”, they are probably experimenting with a combination of different genres.
Harmor
The Basics
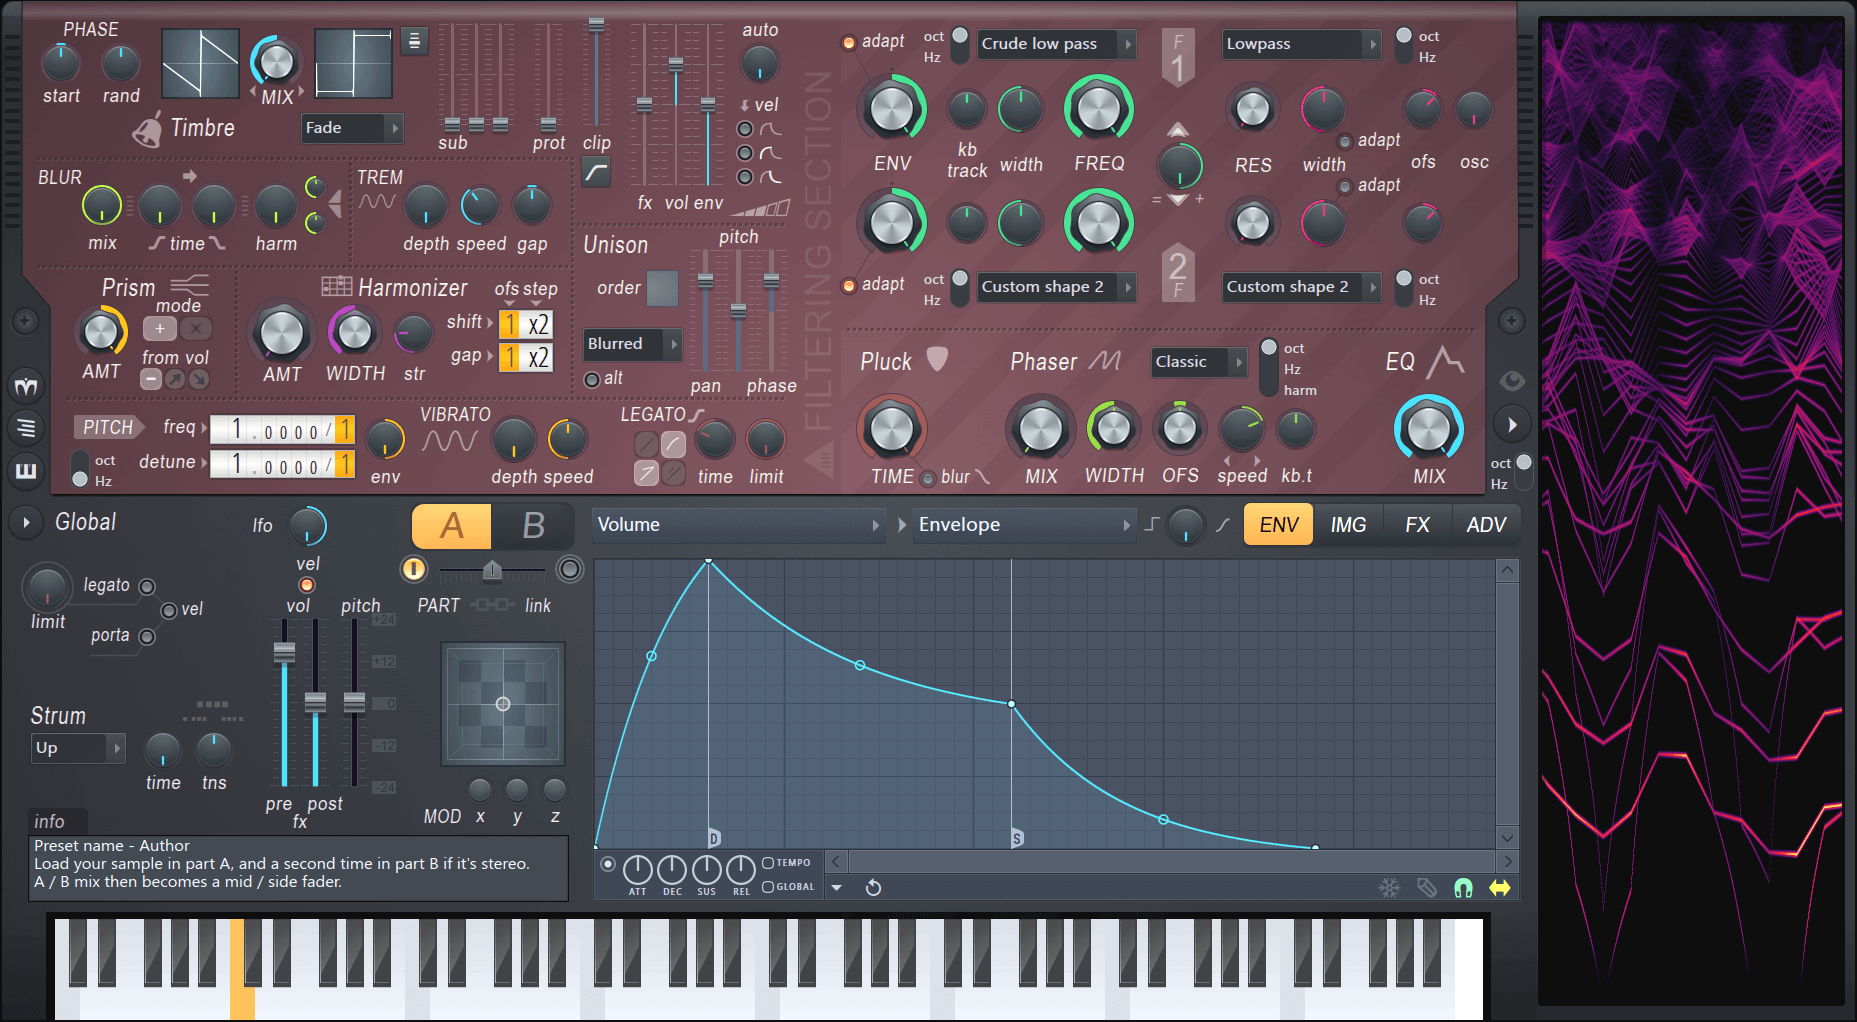
The picture above shows Harmor’s interface. We can group the Interface into three sections: The red part, the gray part and the window to the right. Firstly, the easiest section to understand is the window to the right. Harmor is an additive synthesizer, which means the sounds it generates are made up of sine waves added on top of each other. The window on the right displays the frequencies of the individual sine waves, played over the last few seconds. Secondly, the red window is where most of the sound is generated. There are different sections and color-coded knobs to be able to identify what works together. Left of the center you can see an A/B switch. The red section exists twice: once for state A and once for state B. These states can be mixed together via the fader below. Lastly the gray area is for global controls. The only exception is the IMG tab, which we will cover a little later. As you can see there are many knob, tabs and dropdowns. But in addition to that most most of the processing can be altered with envelopes. These allow the user to draw a graph with infinitely many points to either use it as an ADSR curve, an LFO, or map it to keyboard, velocity, X, Y & Z quick modulation and more. At this point it already might become clear that Harmor is a hugely versatile synth. It’s marketed as an additive / subtractive synthesizer and features an immense amount of features which we will take a closer look at now.
Additive or Subtractive?
As mentioned above Harmor is marketed as an additive / subtractive synthesizer. But what does that mean? While Harmor is built using additive synthesis as its foundation, the available features closely resemble a typical subtractive synth. But because Harmor is additive, there are no audio streams being processed. Instead a table of frequency and amplitude data is manipulated resulting in an efficient, accurate and partly very unfamiliar and creative way to generate audio streams. Harmor features four of these additive / subtractive oscillators. Two can be seen on the image above in the top left corner. These can be mixed in different modes and then again mixed with the other two via the A/B switch. In addition to the four oscillators, Harmor is also able to synthesize sound from the IMG section. The user can drag-and-drop audio or image files in and Harmor can act like a sampler, re-synthesizing audio or even generating audio from images drawn in Photoshop.
The Generator Section

As you can see in addition to the different subsections being walled in by dotted lines, this section is color coded as well. The Timbre section allows you to select any waveform by again drawing and then morphing between two of them with different mixing modes. Harmor allows you to import a single cycle waveform to generate the envelope. But you can import any sample and generate a waveform from it. Here is an example where I dragged a full song into it and processed it with the internal compressor module only:
The blur module allows you to generate reverb-like effects and also preverb. Tremolo generates the effect of a stereo vibrato, think about jazz organs. Harmonizer clones existing harmonics by the offset/octaves defined. And prism shifts partials away from their original relationship with the fundamental frequency. A little prism usually generates a detune-like effect, more usually metallic sounds. And here is the interesting part: As with many other parameters as well, you can edit the harmonic prism mapping via the envelopes section. This allows you to create an offset to the amount knob on a per frequency basis. Here is an example of a usage of prism:

As you can see in the analyzer on the right: There is movement over time. In the Harmonic prism envelope I painted a graph so that the knob does not modify lower frequencies but only starts at +3 octaves.
The other options from this section, unison, pitch, vibrato and legato should be clear from other synthesizers.
The Filter Section

As seen above, Harmor features two filters per state. Each filter can have a curve selected from the presets menu. The presets include low pass, band pass, high pass and comb filtering. Additionally you can draw your own curve as explained in the Basics section above. The filters can additionally be control the mix for the envelope, keyboard tracking, width, actual frequency and resonance. But the cool thing is how these filters are combined: The knob in the middle lets you fade between only filter 2, parallel processing, only filter 1, filter 1 + serial processing and serial processing only. In the bottom half there is a one-knob pluck knob as well as a phaser module with, again, custom shaped filters.
The Bottom Section

As you can see above the bottom section features some general global functions. On the left side most should be clear. The XYZ coordinate grid offers a fast way to automate many parameters by mapping them to either X Y or Z and then just editing events in the DAW. On the top right however there are four tabs that open new views. Above we have seen the ENV section where you can modulate about anything. The green tab is the image tab. We already know that Harmor can generate sound from images and sound (not that this is a different way of using existing sound, before I loaded it into an oscillator, now we are talking about the IMG tab). On the right you can see a whole lot of knobs, some of them can be modified by clicking in the image. C and F are course and fine playback speed adjustments, time is the time offset. The other controls are used to change how the image is interpreted and partially could be outsourced to image editors. I’m going to skip this part, as this post would get a whole lot more complicated if not. It would probably be best to just try it out yourself.

The third tab contains some standard effects. These are quite good but especially the compressor stands out as it rivals the easy-but-usefullness of OTT.

And finally, the last section: Advanced (did you really think this was advanced until now? :P) Literally the whole plugin can be restructured here. I usually only go in here to enable perfect precision mode, threaded mode (enables multi core processing) and high precision image resynthesis. Most of these features are usually not needed and seem more like debugging features so I will not go into detail about them, but like before I encourage you to try it out. Harmor can be very overwhelming and as many people mention in reviews: “Harmor’s biggest strength is also it’s greatest weakness, and probably why there are so few reviews for such an amazing synth. You can use Harmor for years, and still feel like a noob only scratching the surface. That makes writing a review difficult. How can you give an in-depth review, when you feel so green behind the ears? You only need to watch a few YT videos (e.g. Seamless) or chat with another user to discover yet another side to this truly versatile beast.”
Harmor on KVR ⬈
Harmor on Image-Line ⬈
Harmor Documentation ⬈ (a whole lot more details and a clickable image if you have more detailed questions)
The Loudness War
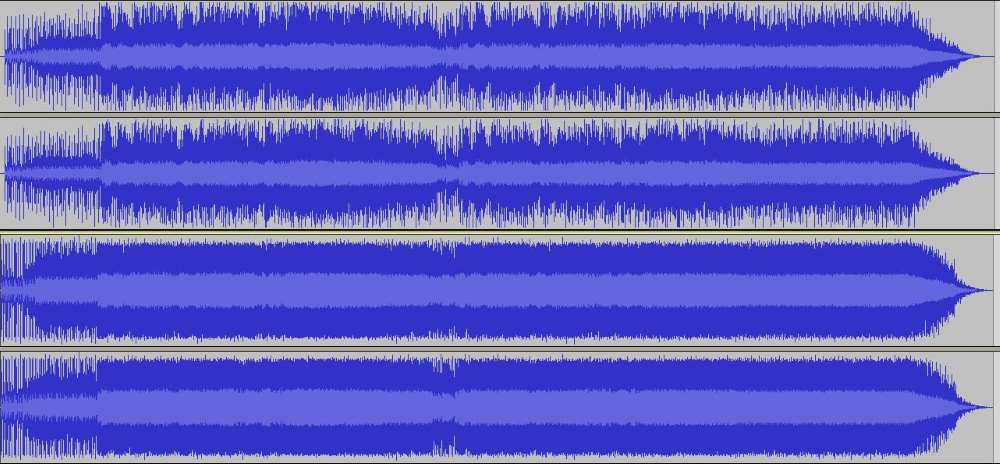
Before starting, look at the top image. These 2 sets of sound files, mastered/limited at different levels. The first one is from the 90s and the second one is what is being done post 2010. Just by looking at the graphic representations, you can tell that the first song has a lot of breathing space and room for expression, while the second one looks a bit like the life has been squeezed out of it. This is the loudness war in a nutshell- people competing to squeeze in as much volume as possible within the range that we can digitally produce.
So why is the loudness war happening? Usually, we perceive louder as better, even if a song might not be better mixed. Basically, music is getting progressively louder as time passes, thus becoming less dynamic and lively.
What are the basics of loudness? There are a few units used in measurement- LUFS (loudness units relative to scale and DBTP (decibels true peak). Our DAWs by default show a different unit- DBFS (decibels relative to full scale), which is does not show us the overall average loudness, just the momentary peaks. LUFS are actually closer to how our ear perceives loudness. It is similar to RMS (root mean square) but still closer to our own loudness perception. When mastering audio/music, it is highly recommended to get a measurement tool that includes at least these measures (but ideally give you access to more insights into your track’s dynamics, spectrum and similar):
- Short-Term LUFS – Short-term peak at the current listening point
- Integrated LUFS – overall loudness of the whole track
- Dynamic Range – the difference between the quietest and the loudest part of the track
- Momentary Max LUFS – the highest peak measured in LUFS within the audio/music that is being analysed
- True Peak – The maximum peak level of the audio measured real-time, measured in DBTP. Different from the regular peak (which relates to individual tracks inside the mix)
- Loudness range LUFS- measures the perceived loudness of audio material. Similarly to dynamic range, it tracks the difference in loudness between different parts of the audio
It is a big challenge to determine which loudness you should use, taking into consideration loudness perception, as well as different loudness standards presents on each streaming/music platform. Platforms apply loudness normalisation, which sets every audio file to the same integrated loudness. From my own experience, one loudness setting will never be perfect for every use case, but the most important thing is to find a compromise and choose a loudness/true peak level that sound solid on every service. Sometimes, the audio will be turned up, and sometimes turned down by certain services, depending on their own normalisation standards. Each platform will normalize the audio according to their own standards, so it is just important to make sure your source material dynamic range is good enough to not get completely squished by a music platform. The good news is that each platform recommends a dynamic range that is 9 DR or less (meaning 9 dbs difference between the loudest and quietest part).
Here are some of the standards used by the most popular platforms:
- Spotify – -14 LUFS/ -1 DBTP (-11/-2 is also fine)
- Deezer – -14 to -16 LUFS /-1 DBTP
- Beatport – -6 to -9 LUFS /-1 DBTP
- Apple Music – -16 LUFD/-1 DBTP
- Bandcamp – No loudness normalisation, but -2DBTP is recommended for the peaks due to low playback quality they offer
- Tidal – -14 LUFS/-1 DBTP
- YouTube – -13 to -15 LUFS /-1 DBTP
- SoundCloud – -8 to -13 LUFS /-1 DBTP
Sources:
https://www.masteringthemix.com/pages/mixing-with-levels#LoudnessRange
www.audiodraft.com/blog/audio-levels-101-all-you-need-is-lufs
https://artists.spotify.com/help/article/loudness-normalization
How to- Fundraising for Creative Projects
I am currently in the phase of looking for money for my ProWorks project and I thought it would be a great idea to share what I have learned so far in preparation of the campaign launch (which is coming in about 1-2 weeks after this post). This is no easy task- fundraising will eat away at your time due to having to promote yourself so heavily in order to attract investors. Here are the general steps that you can take, as well as tips for each of them.
- To get investments, you need to have an established platform
Here is the biggest reason why so many campaigns fail- the authors did not have a platform large enough to attract sufficient investments. Now, I’m not saying the only way is to be an influential figure online- you can play it smart. If you have no following of your own, why not borrow someone else’s? Here in thinking of platforms that promote campaigns, as well as people that you might possibly have in your professional/friend network. Do you know anyone who has a big platform? Or who knows other big online personalities? It’s very important to think about these things years ahead- you need to have already formed friendships with “important” people in order to have the necessary support- and not have to pay for promotion. Other than that- I would definitely mix in a little bit of a paid promotion type of deal. Find Instagram pages that have a large following and a lot of engagement from followers. Make sure they are relevant to your project. There are probably a lot of accounts dedicated only to promotion of fundraising campaigns, and I’m sure some of them also have a specific niche they want to stay within.
2. Choose the right platform for you
There are many platforms out there, but I would suggest sticking to those that are the most popular, as they will have the biggest number of visitors, thus increasing your chances of being seen. I would say in most cases it’s enough to be on just one platform. The most popular ones are KickStarter, IndieGoGo and GoFundMe. Now, you might have to compromise and pick a platform based on which countries they support. Unfortunately, most of the platforms don’t support my country of origin (Bosnia), but luckily my project partner is Austrian, so we decided to open a KickStarter Campaign through her. Pick a platform based on the type of project you are fundraising for. Kickstarter is best overall, for almost any type of campaign, which IndieGoGo is best for independent project and GoFundMe is for personal fundraising (e.g. emergency surgeries, college fund, etc).
3. Most importantly- make sure your project is interesting/good enough to warrant investments
The hard truth is that you can have all of the above, but if your idea is bad, nothing will help! So be honest with yourself and try to gauge how useful/creative/interesting the project is. Ask everyone you know to give you honest opinions and conduct anonymous questionnaires online to get aa better idea how much success the project could potentially result in.
4. Bonus tip- create a Ko-Fi account
This is not necessarily tied to fundraising for a specific project, but rather just a platform where people can either donate to you one time or subscribe. Ko-Fi is always good to have, in order to collect some small amount of funds over time and being able to use then as extra investment money for one of your future projects.
How Everyone is Capable of Making Synaesthetic Correlations
Synaesthesia has already been thoroughly described in my previous articles pertaining to my ProWorks Research. But today I want to present something fun and engaging in hopes that I will provoke you to explore your mind more.
Believe it or not, even people who have no synaesthetic tendencies often still subconsciously make multi-sensory correlations. Plainly put, perhaps we can say synesthesia has a big spectrum of intensity, and a lot of it is learned and acquired throughout our lives, through conditioning and cultural norms.
After going through this article, even if you feel like you still don’t relate to the examples shown, it is important to note that synaesthesia can be to some extent induced by meditation, practising and training oneself. Before reviewing the examples listed below, you should perform the synaesthesia test on the following link. Even though this type of test is a scientific method, the website discourages its users from self-diagnosing. This is because even if you test well or not, this test does not cover all types of synaesthesia. You might have some other form that is not being tested by this quiz.
If you performed the test, you should have your suggested result and now you can proceed to check these examples. There is something called the Kiki-Bouba effect, which describes a form of ideasthesia- where we assign names and miraculously even personality traits to shapes. Below are 2 different shapes- if you assign them the correct one, you successfully relate to ideasthesia. So, which one is Kiki and which one is Bouba:
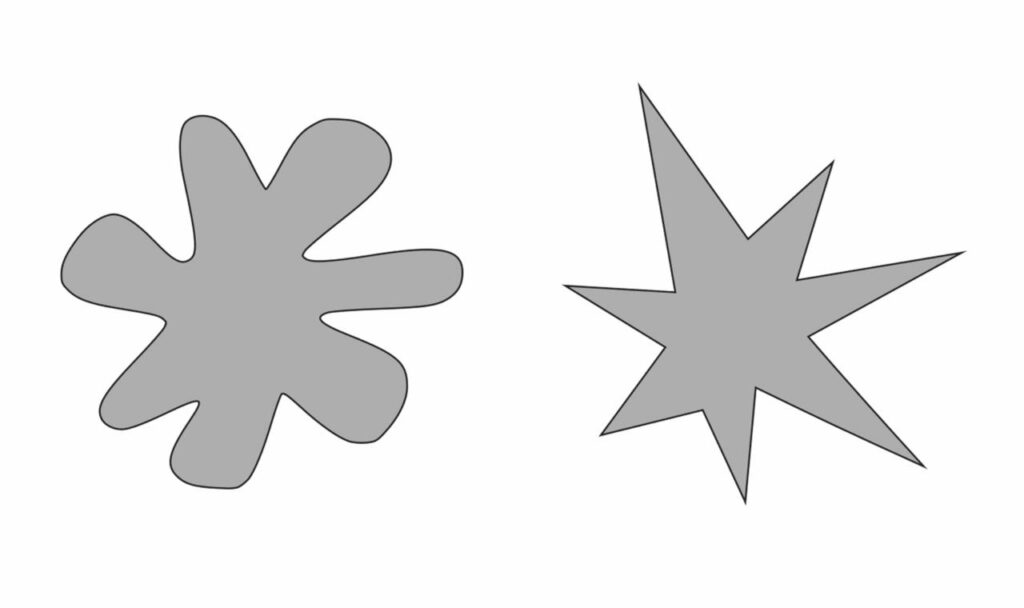
The correct answer is Bouba and Kiki respectively. Here is another one, just to drive the point home. Which one is Takete and which is Maluma:
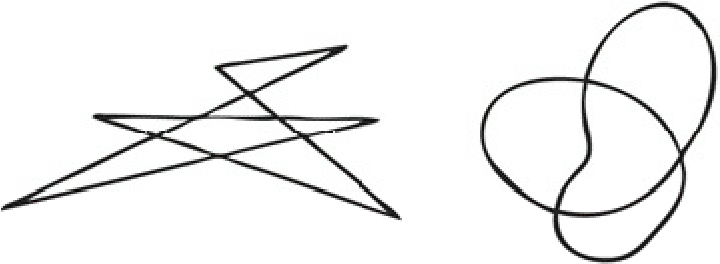
Correct: Takete and Malouma respectively. What if I told you that 80% of people can correctly assign all these shapes a personality trait as well? The word Kiki is usually associated with the following words: happy, clever, small, tall, thin, young, unpleasant, nervous and upper class. This test also demonstrates the fat-thin effect (with most people stating Kiki is thin). This might be coming from a slew of popular Characters, like Don Quixote and Sancho Panza, Asterix and Obelix, etc.

Unique Music Tools to Spark Your Creativity
Creating music is becoming increasingly easier and more creative as technology advances. There are some amazing (most for free!) tools online that really sparked my creativity. This article lists some of my favourites, along with links, so that you too can try them out and get inspired!
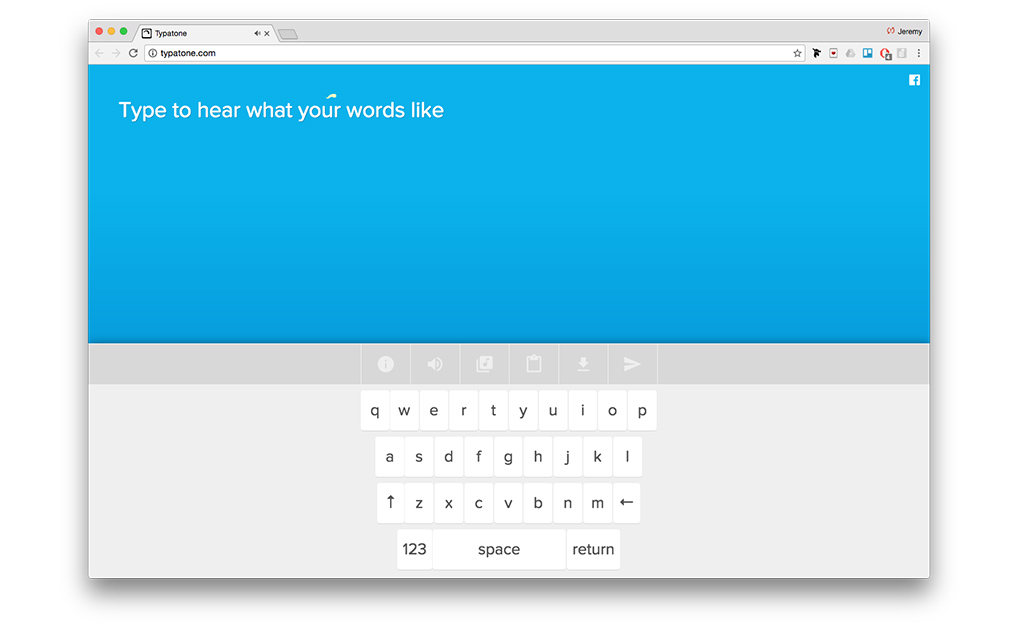
Typatone
Type anything into Typatone and it will turn every letter into a beautiful sound. Switch the instrument to find what you like best. There’s tons of option. You can transform any text into ambient music by copy-pasting it into Typatone or just writing it straight inside the editor. Cool tip: check how your name sounds! There is a download button so you can save all your creations.
Google ToneTransfer
This tool is extremely appealing from a sound design perspective. It allows you to create completely nw instruments/textures out of your own recordings. The online tool has a few instruments available into which you can morph your recording. The transformation works on the principle of formant transfer. Google recommends trying how your voice sounds as a different instrument! Try using random objects or other instruments and then turning them into anything from the given list. Sometimes, the results are quite realistic, but sometimes the software produces weird textures/sounds, which can sound quite cool and unique. Try ToneTransfer here.

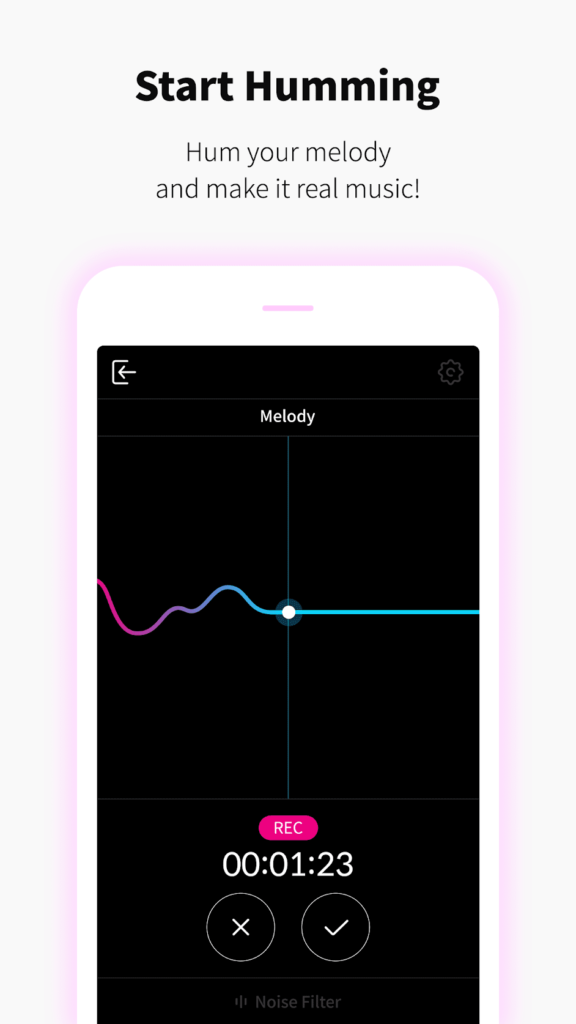
HumOn App
This is a very easy way to help make music. Simply, hum the memory into your phone microphone and the app will generate MIDI. HumOn is especially good if you want ideas on what to make. It has additional features, sounds and loops which enable you to create more than just a simple melody. This app is far from the best, but it is quite fun to use. The humming can go off key when the app records it, but it isn’t something to be too mad about. HumOn is both iOS and Android- compatible.
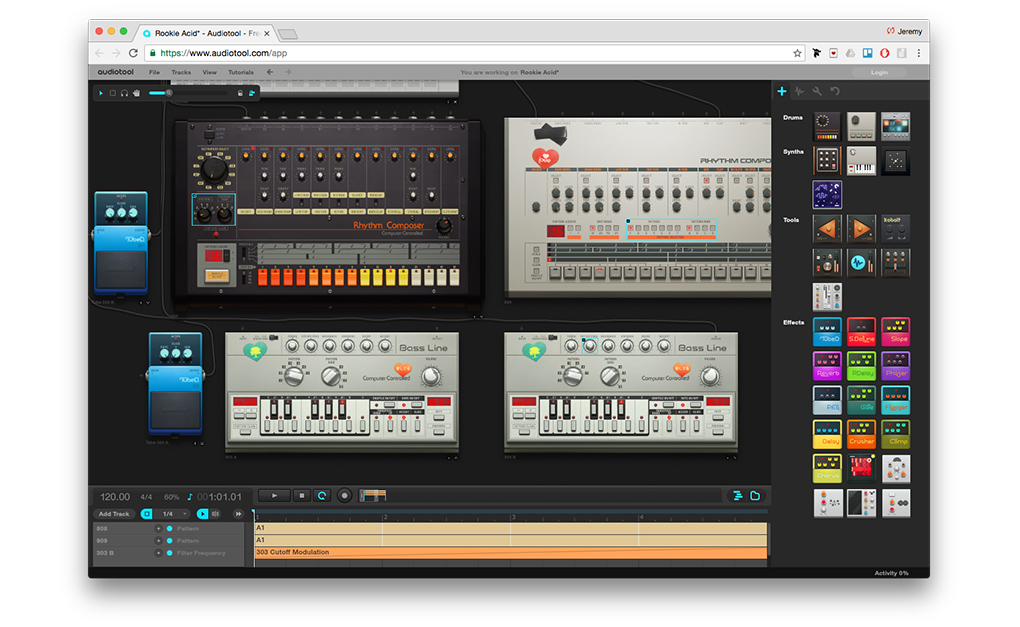
Audio Tool
AudioTool is an online production studio that feels like a real studio. You can play with iconic gear, like TR-909s, TR-808s and TB-303s just to name a few. Customise your setup as much as you want- all for free! Plug cables and tweak knobs manually. It’s all saved in the cloud. There’s also loads of tutorials to watch.
Interactive YouTube Instruments
There’s a whole culture of interactive videos on YouTube that I just discovered. And a lot of them are playable instruments! How does it work. The author uploads a video consisting of one shots of a chosen instruments. You can skip through timestamps by using the number pad on your keyboard. So basically, the number pad is now your MIDI keyboard. Frankly interactive YouTube videos are a very creative way of creating a cool user experience through videos. The channels Amosdoll Music and Play With Keyboard seem to be the most prominent in this field of music creation.